
Cost
How America Renovates 2026: The State of US Renovations
04.06.2026
05.22.2025
In This Article
There’s no perfect time to take on a whole house remodel—but there’s usually a moment when it starts to feel necessary. Maybe it’s after tripping over the same too-small entryway for the hundredth time. Maybe it’s the guest bathroom you always apologize for. Or maybe your home just doesn’t match the way you actually live anymore.
A full-scale renovation is a big deal. It’s not something you do on a whim—but it can be exactly the right next step if you’re ready to make your home work better for you. And not just in pieces—room by room—but as a connected, intentional space.
This guide is here to help you wrap your head around the process. We’ll walk through everything from early planning and budgeting to hiring the right contractor and navigating the details. Not all at once. Just one step at a time.
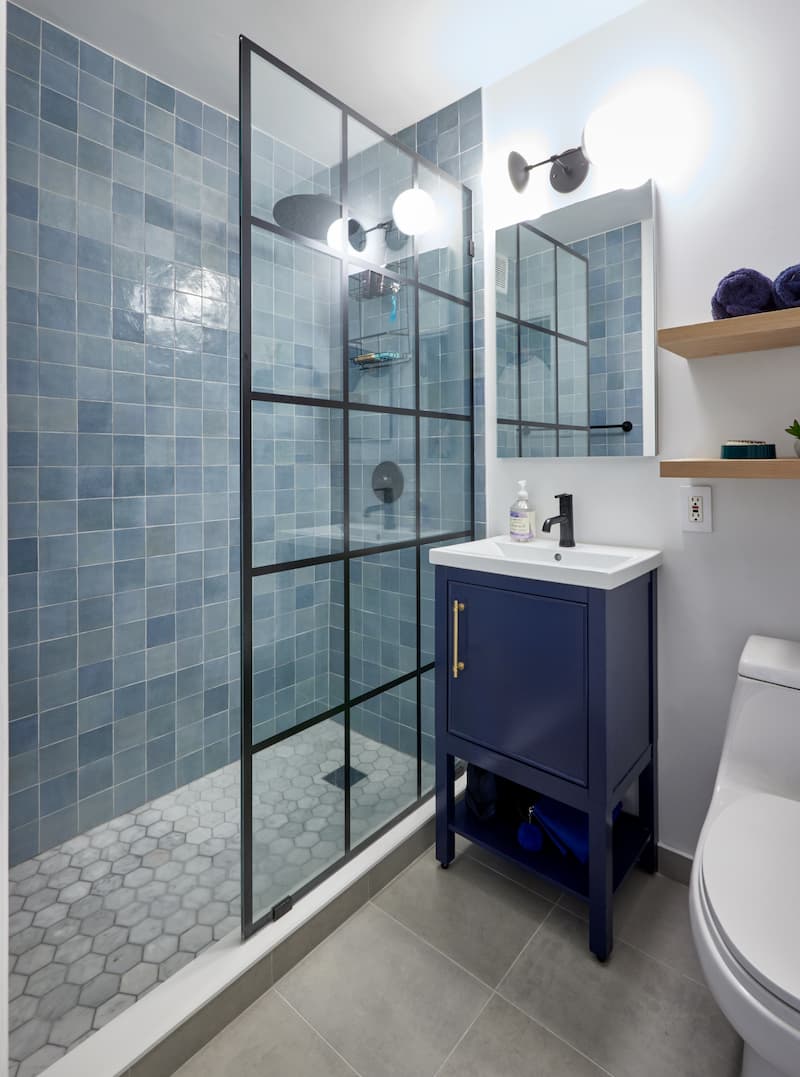
It’s more than a new backsplash or swapping out light fixtures. A whole house remodel usually means layout changes, system upgrades (like plumbing or electrical), and reworking multiple spaces at once—kitchen, bathrooms, living areas, maybe even structural changes. It’s a reset, not just a refresh.
So what’s usually included? Think layout changes, new plumbing or electrical, redoing the kitchen and bathrooms, replacing floors, upgrading insulation or windows—sometimes even moving walls. It really depends on what’s not working for you anymore.
The timeline? That varies. Some projects take 4–6 months. Others stretch to a year or more, especially if you’re waiting on permits, living in the house during construction, or making structural changes. It’s not quick. But knowing that up front can save you a lot of stress later.
Here’s the main thing: A whole house remodel is a big step, but it’s also a chance to make your space finally feel like yours. The way you cook, relax, host friends, or just live—it should all work better. So let’s talk about how to start planning.
Renovate with confidence every step of the way
Step 1: Personalize Your Renovation Plan
Step 2: Receive Quotes from Trusted Contractors
Step 3: Let Us Handle the Project Details

Before you talk to a contractor or start pulling permits, take a step back. What do you actually want from this custom home remodel? Not just in terms of square footage or finishes, but how you want your home to function, feel, and work for you.
Start with the basics: What’s not working? Maybe the kitchen layout makes dinner feel chaotic. Maybe you need a home office with real walls, not a laptop at the dining table. Maybe it’s just time to bring your space into this decade. Whatever it is, be honest about your pain points.
From there, think about goals. Are you renovating to stay long-term, boost resale value, or both? Do you care most about smart storage, modern aesthetics, energy efficiency, or all three?
Once you’ve nailed down your must-haves, separate them from the nice-to-haves. Maybe radiant heated floors sound amazing (they are), but they’re not essential if you’re tight on budget. Getting clear now will help you make better trade-offs later.
This is also the fun part: Start gathering inspiration. Build a digital mood board, tear out magazine pages, and take photos of tiles you love at a friend’s house. Visit showrooms if you can. The more visuals you collect, the easier it is to communicate your vision and stay grounded when decisions pile up later.
Think of this as your renovation compass. The clearer your goals, the easier the path forward.
Block Tip: "Contractors cannot see behind the walls. No one really knows what's what's going to happen until demolition is done, and then some things might unearth themselves. Make sure that you are budgeting for 10 to 20 percent [for contingency] so that you're not in a situation where something comes up and you have to cut corners or you have to make crazy trade-offs. You want to make sure that what you're doing is done correctly." Danny Wang, Block Renovation Expert
Let’s talk numbers. A whole house remodel is a major investment, and creating a solid budget upfront can save you from stress and sticker shock down the line.
Costs vary widely depending on where you live, how extensive the work is, and the materials you choose. A full remodel might range from $100,000 to $500,000 or more, but the key is understanding your project’s scope and how to break it down.
Here’s what your budget should typically include:
To stay on track, get clear quotes, stick to your scope, and avoid mid-project changes unless they’re truly necessary. Prioritize your must-haves, and be prepared to flex on nice-to-haves if needed.
As for how to pay: Many homeowners use a mix of savings, financing, and credit. Renovation loans, HELOCs, or financing options through your contractor or platform (like Block) can help spread costs without sacrificing your vision.

"No one really knows what's going to happen until demolition is done, so make sure that you are budgeting for 10 to 20 percent [for contingency]."
The success of your remodel hinges on one thing more than anything else: your contractor. They’re not just swinging hammers—they’re managing crews, solving problems, and translating your vision into reality. This is someone you’ll be working with closely for months. You want the right fit.
Most people start online, which makes sense—but cast a smart net. Not all platforms screen contractors equally. Look for services that actually vet professionals and match you based on your goals, not just your zip code. That said, don’t underestimate the power of a local referral. If a neighbor had a great experience, that’s worth following up on.
When you’re reviewing potential contractors, credentials matter—but so does real experience. Make sure they’re licensed and insured, yes. But also ask: have they done full-home remodels before, not just kitchens or quick flips? Can they show you photos of finished projects that reflect the scale and style you’re going for?
You’ll learn a lot from how they talk about your project. Do they explain things clearly? Can they walk you through the contract, payment terms, and schedule without rushing or glossing over details?
Don’t hesitate to ask:
You want someone calm under pressure, honest about the bumps, and focused on solutions. A contractor is your renovation partner. And the right one will make the whole process feel steadier, clearer, and a lot less overwhelming.
Turn your renovation vision into reality
Get matched with trusted contractors and start your renovation today!
Find a Contractor
Once you’ve chosen your contractor, it’s time to turn ideas into a clear plan. This step is where your renovation starts to take shape—literally.
Start with the layout. You’ll work with your contractor or designer to create detailed drawings, often using CAD software, 3D renderings, or digital mockups. These help you visualize how the new space will function and flag any issues before construction begins. Don’t rush this phase—it’s easier to move a wall on screen than after it’s been framed.
If you’re living at home during the remodel, discuss how to phase the work. Can the project be done in sections so you always have a bathroom or kitchen available? Where will you store belongings during construction? These are small things that make a big difference in day-to-day livability.
Materials planning is another critical piece. Finalize your fixtures, tile, appliances, and flooring early so they’re ready when your crew is. Delays in sourcing are one of the most common reasons projects fall behind schedule.
And finally, set clear priorities for your budget. What’s worth investing in—and where are you okay dialing back? Maybe the custom cabinetry is a must, but you’re flexible on light fixtures. Knowing this upfront helps your team make decisions aligned with your goals.
Getting the right permits is one of those behind-the-scenes steps that helps your renovation run smoothly from day one. It’s how you know your project meets safety standards, passes inspections, and won’t run into issues down the line, especially if you ever plan to sell your home.
Most whole home remodels require permits for things like structural changes, plumbing and electrical work, or anything that affects the systems behind your walls. Every city is a little different, so timelines and costs can vary. Some permits are quick and simple. Others take longer, especially if your plans involve major changes or you live in a high-demand area.
If your home is part of an HOA or in a historic district, you may need additional approvals. These might include submitting design plans or notifying neighbors. It can feel like a few extra steps, but having a plan that’s been signed off across the board gives you peace of mind as the work begins.
In most cases, your contractor will handle the entire permitting process. Still, it’s worth confirming. Ask what’s included and whether they’ll manage communication with the city or any outside review boards.
Permits aren’t a roadblock—they’re part of building with care and intention. When this step is done right, it clears the way for construction to start with confidence, knowing everything’s aligned and ready to go.
There’s no perfect way to live through a remodel—but planning ahead makes a huge difference.
Start with the big question: are you staying in the house, or moving out during construction? If it’s a full gut, living there might not be realistic. No kitchen, dust everywhere, power getting shut off randomly—it wears on you. If you can stay somewhere else, even for part of it, do. If not, talk to your contractor about phasing the work so you’re not losing everything all at once.
Next, you’ll need to deal with your stuff. Furniture, art, anything sentimental—get it out of the way. Some people rent a storage unit, while others shove everything into one room and seal it off. Just don’t leave anything you care about near the action. Things get scratched, covered in dust, or forgotten under drop cloths for months.
You’ll also want to plan for the mess. Ask about dust barriers and floor protection. Get a box of heavy-duty wipes. Buy more painter’s tape than you think you’ll need. It’s not glamorous, but it helps.
And mentally? Expect some chaos. Things will be loud. Deliveries will show up early. Your routine will get interrupted. That’s normal. Having a plan doesn’t eliminate the stress, but it gives you something solid to fall back on when things get hectic. It’s temporary—and the result will be worth it.
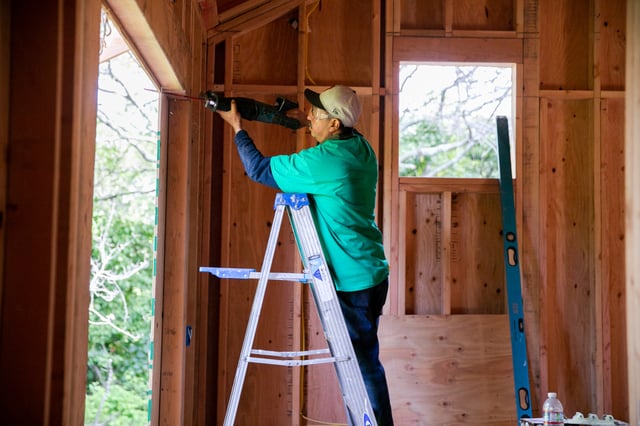
This is where things get real—walls come down, the space clears out, and you finally start to see the bones of your home. Demolition usually happens quickly, but it’s loud, messy, and a little disorienting. Rooms you’ve lived in for years disappear in a day or two. It’s exciting—but also kind of surreal.
After demo, framing begins. That’s when walls get built (or rebuilt), layouts take shape, and everything starts to feel more three-dimensional. Then come the mechanicals: plumbing, electrical, HVAC. These systems keep your home running and must be installed and inspected before anything can get covered up.
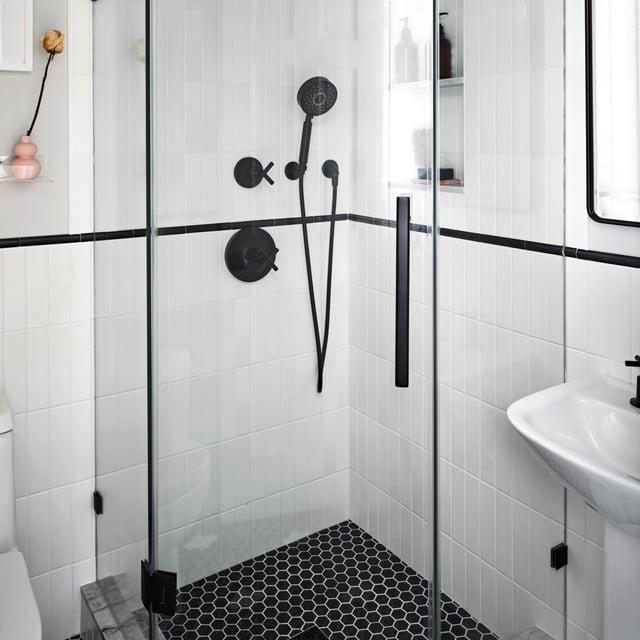
Next up: finishes. Cabinets, tile, flooring, and paint. This part takes time, and it’s where the vision you’ve been planning really comes to life.
To stay on track, work with your contractor to set clear check-in points. Walk through the space after demo. Check framing before drywall goes up. Talk about timelines—not just when things start, but when key decisions need to be made.
Changes will come up. A wall might not be where you expected. A material could be backordered. That’s part of it. The best way to handle setbacks is to stay flexible, ask questions, and keep communication open.
You don’t need to micromanage, but you do need to stay involved. A renovation has a rhythm; the more connected you are to the process, the smoother it all flows.
Renovate now, pay later
Achieve the space you're looking for today, while financing it over time with our trusted partner.*
*Not available in NYC
Learn More
You’re almost there—but before you call the remodel done, there’s one last (important) phase: the final walkthrough.
This is your chance to walk through the finished space with your contractor and look at everything with fresh eyes. Bring a notebook—or better yet, take photos. You’re creating what’s called a punch list—a detailed list of anything that still needs fixing, adjusting, or finishing. Maybe a cabinet door sticks. Maybe there’s a scratch on the floor. Maybe a light switch was installed upside down. Small things, but they matter.
Be thorough. It’s much easier to address these things before final payments are made.
Speaking of payment, make sure you understand what’s due when. Most contracts hold a portion of the payment until the punch list is complete. This is also when your contractor may provide a lien waiver, confirming that subcontractors and suppliers have been paid (important protection for you as the homeowner).
Once everything’s wrapped, ask about warranties and future callbacks. A good contractor will stand by their work and come back to fix issues that pop up in the first few months, whether it’s caulking that settles or a door that shifts.
This final stretch is about closure for the project and your peace of mind. Take the time to make sure every detail feels right. You’ve come a long way, and your new space deserves a strong, confident finish.
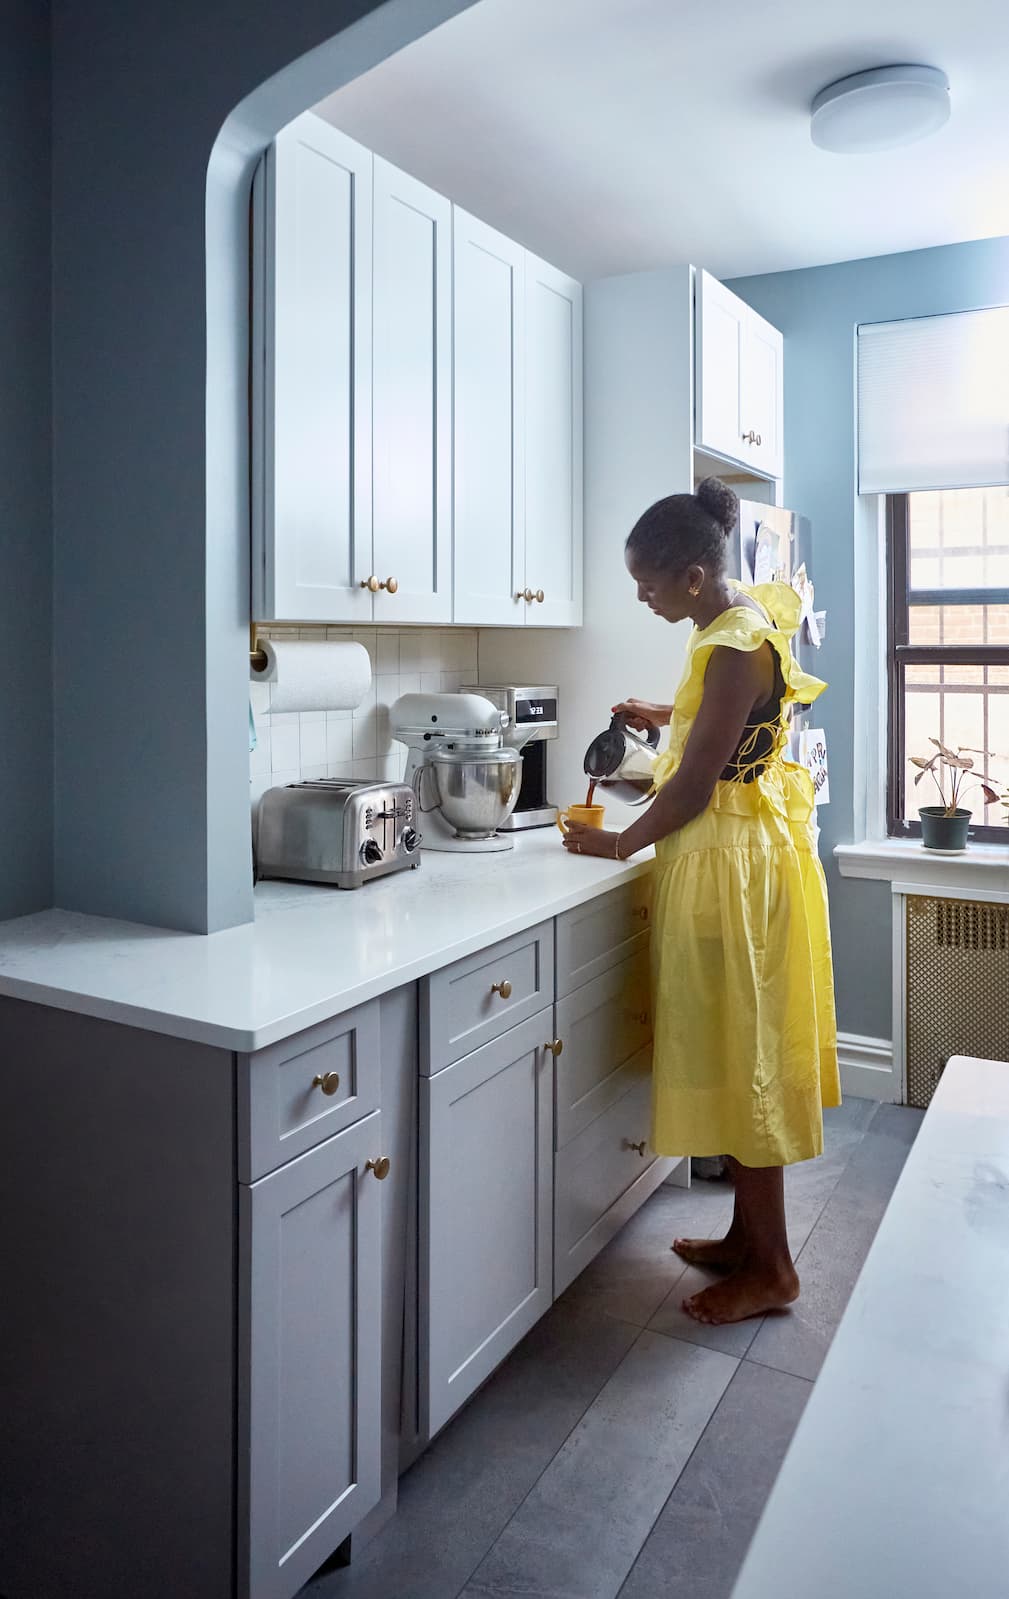
You made it. The dust has cleared, the punch list is complete, and your space finally feels like yours again, only better. Now comes the part you’ve been working toward all along: living in your new home.
Before you fully settle in, it’s worth doing a deep post-construction clean. Even with protective measures, fine dust tends to linger in vents, light fixtures, and corners. Change your air filters, clean ducts if needed, and open windows to let in fresh air. A professional cleaning service that specializes in post-renovation work can be a smart investment here.
Once everything’s sparkling, take time to really enjoy the space. You’ve built something thoughtful—now let it support your day-to-day life. Whether it’s hosting friends in your new kitchen or simply waking up in a bedroom that finally feels calming, these small moments are what it’s all about.
To keep your upgrades looking their best, create a simple maintenance routine. Wipe down the tile and stone with the right cleaners. Keep an eye on caulking and grout. For wood floors and custom cabinetry, avoid harsh chemicals and stick to recommended care products. If your contractor provided manuals or care instructions, hold onto them—you’ll thank yourself later.
A remodel isn’t just about a fresh start for your home. It’s about creating a space that works better for how you live, now and in the future. Take a breath, look around, and enjoy what you’ve built. You’ve earned it.
A whole house remodel is a big undertaking—but with the right plan, it becomes a step-by-step process that’s completely within reach. From defining your goals and setting a budget to hiring the right contractor and managing the details, each stage builds toward a home that truly reflects how you want to live.
Thoughtful planning, clear communication, and professional guidance make all the difference. When you approach your renovation with intention—and surround yourself with the right experts—you avoid common pitfalls and stay focused on what matters most: creating a space you’ll love for years to come.
At Block Renovation, we’re here to support you every step of the way. From design tools and budgeting to contractor matchmaking and project oversight, we help turn your vision into reality—with clarity, confidence, and care.
Ready to get started? Connect with Block today and take the first step toward a home that finally fits you.

Renovate confidently with Block
Easily compare quotes from top quality contractors, and get peace of mind with warranty & price protections.
Cost
How America Renovates 2026: The State of US Renovations
04.06.2026
Contractors
Half Bathroom to Full Conversion: Costs, Permits & Designs
08.02.2025

Process
Gutting a Bathroom: What It Entails, Costs & Timeline
07.15.2025
Remodeling
Does Homeowners Insurance Cover Renovations?
05.22.2025

Remodeling
What’s the Difference Between a Home Renovation and a Remodel?
05.22.2025