

Before and After
Limewash Brick Before and After: Photos and What to Know
06.10.2026
05.04.2026

In This Article
A master bedroom is the room your nervous system gets to settle in for a third of your life. It's also, somehow, the room most homeowners renovate last. By the time the kitchen and the bathrooms are done, the budget is tired, and the bedroom gets a new coat of beige.
It doesn't have to be that way. A master bedroom renovation costs a fraction of what a kitchen does, with no plumbing to reroute and no cabinetry to fabricate. The work is mostly cosmetic and mostly fast. Most master bedroom projects wrap in two to four weeks, and most can be done while you're still living in the house. The seven master bedroom before-and-after projects below show how much that money and that time can do.
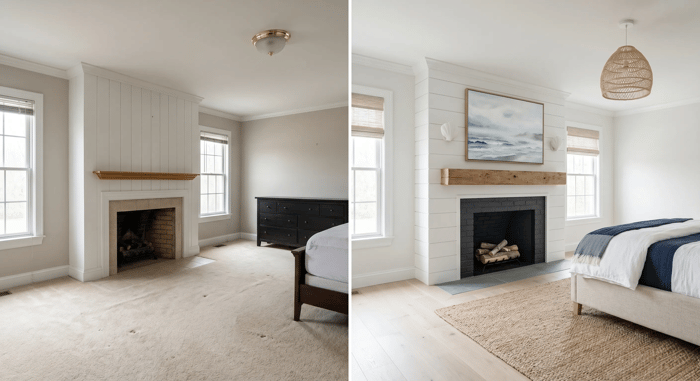
Outside of your ceiling, the focal wall is the last thing you'll see at night and the first thing you'll see in the morning, which means it deserves a deliberate decision rather than the same flat drywall as the rest of the room.
In the before-and-after below, the bedroom’s focal wall got a horizontal shiplap treatment, a darkened firebox, and a chunky reclaimed mantel. Shiplap is just one option. You could go with vertical board-and-batten for something more traditional, a floor-to-ceiling tile surround for something more modern, or applied trim painted in a single drenched color for drama. Material costs for a feature wall like this typically run $2,000 to $6,000 installed, depending on the treatment and whether you're refacing a fireplace at the same time. The point isn't the specific material, it's that the wall your eye lands on first should look like someone made a decision about it.
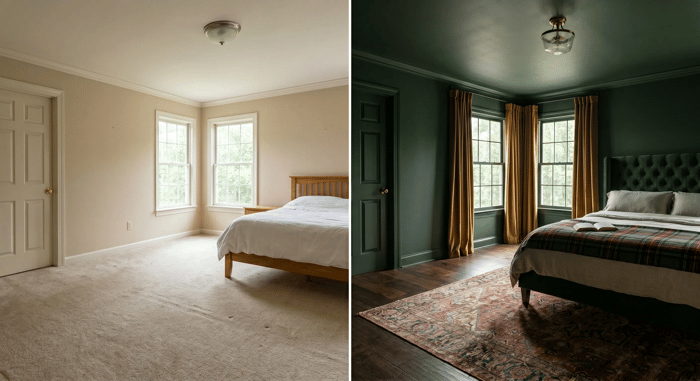
Most builder-grade master bedrooms are simple boxes with beige walls, white trim, and a white ceiling that all compete with each other in a room that has no real architecture to begin with.
Color-drenching solves this by painting every surface in the same color, including walls, trim, ceiling, doors, and baseboards. The before-and-after below uses a deep forest green, but the technique works in almost any saturated color with enough depth, whether that's a muted clay or a warm oxblood. The awkward edges of the room disappear, the architecture reads as one coherent envelope, and whatever you put inside the room becomes the only thing the eye has to land on. Budget $1,500 to $3,500 for a professional crew to color-drench an average master bedroom, including ceiling and trim, and plan on three to four days of work.
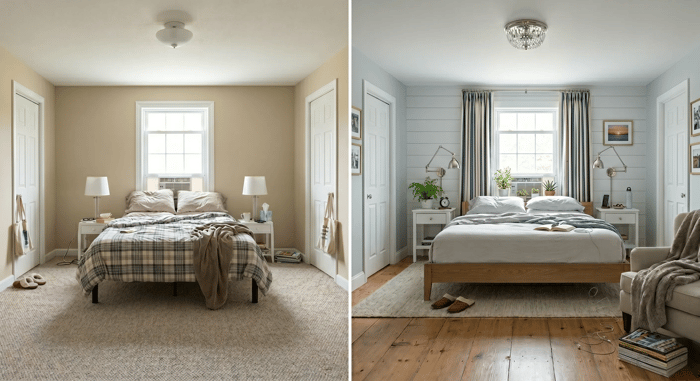
Every room has lines, even if you've never thought about them. The seams of the flooring, the edges of the trim, and the rhythm of a paneled wall all tell the eye where to look, whether you've planned for it or not.
The before-and-after below uses two horizontal plank treatments, a soft shiplap accent wall and wide-plank wood floors, to pull attention straight to the bed. You could do the same thing with vertical paneling running up to a tall headboard, or with a herringbone floor pattern that points toward a fireplace. Pick the thing in the room you want people to see first, then choose materials whose lines run toward it.
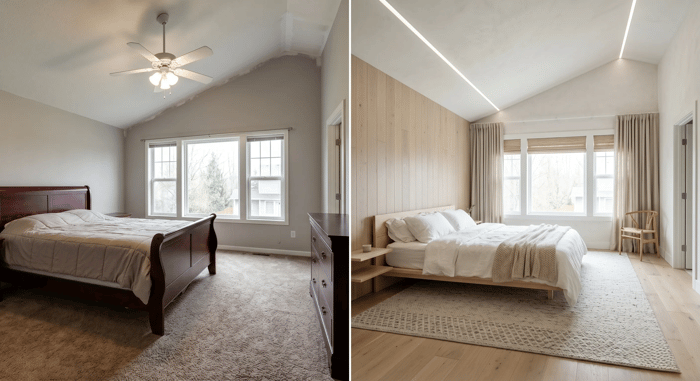
Vaulted ceilings, tray ceilings, coffered ceilings, and beamed ceilings are gifts. Most builder lighting packages waste them with a single flush-mount in the middle of the room or a ceiling fan dangling from the peak.
The before-and-after below runs a recessed linear LED along the ridgeline of a vaulted ceiling, tracing the slope instead of fighting it. Other approaches work just as well: you could uplight the inside of a tray ceiling, run picture-light-style fixtures along a beam, or hang a long linear pendant down the spine of the room. A real lighting plan with a licensed electrician usually runs $2,500 to $7,000 in a master bedroom, depending on how much new wiring is involved. The principle holds either way, which is that when your ceiling has geometry, the lighting plan is part of the architecture.
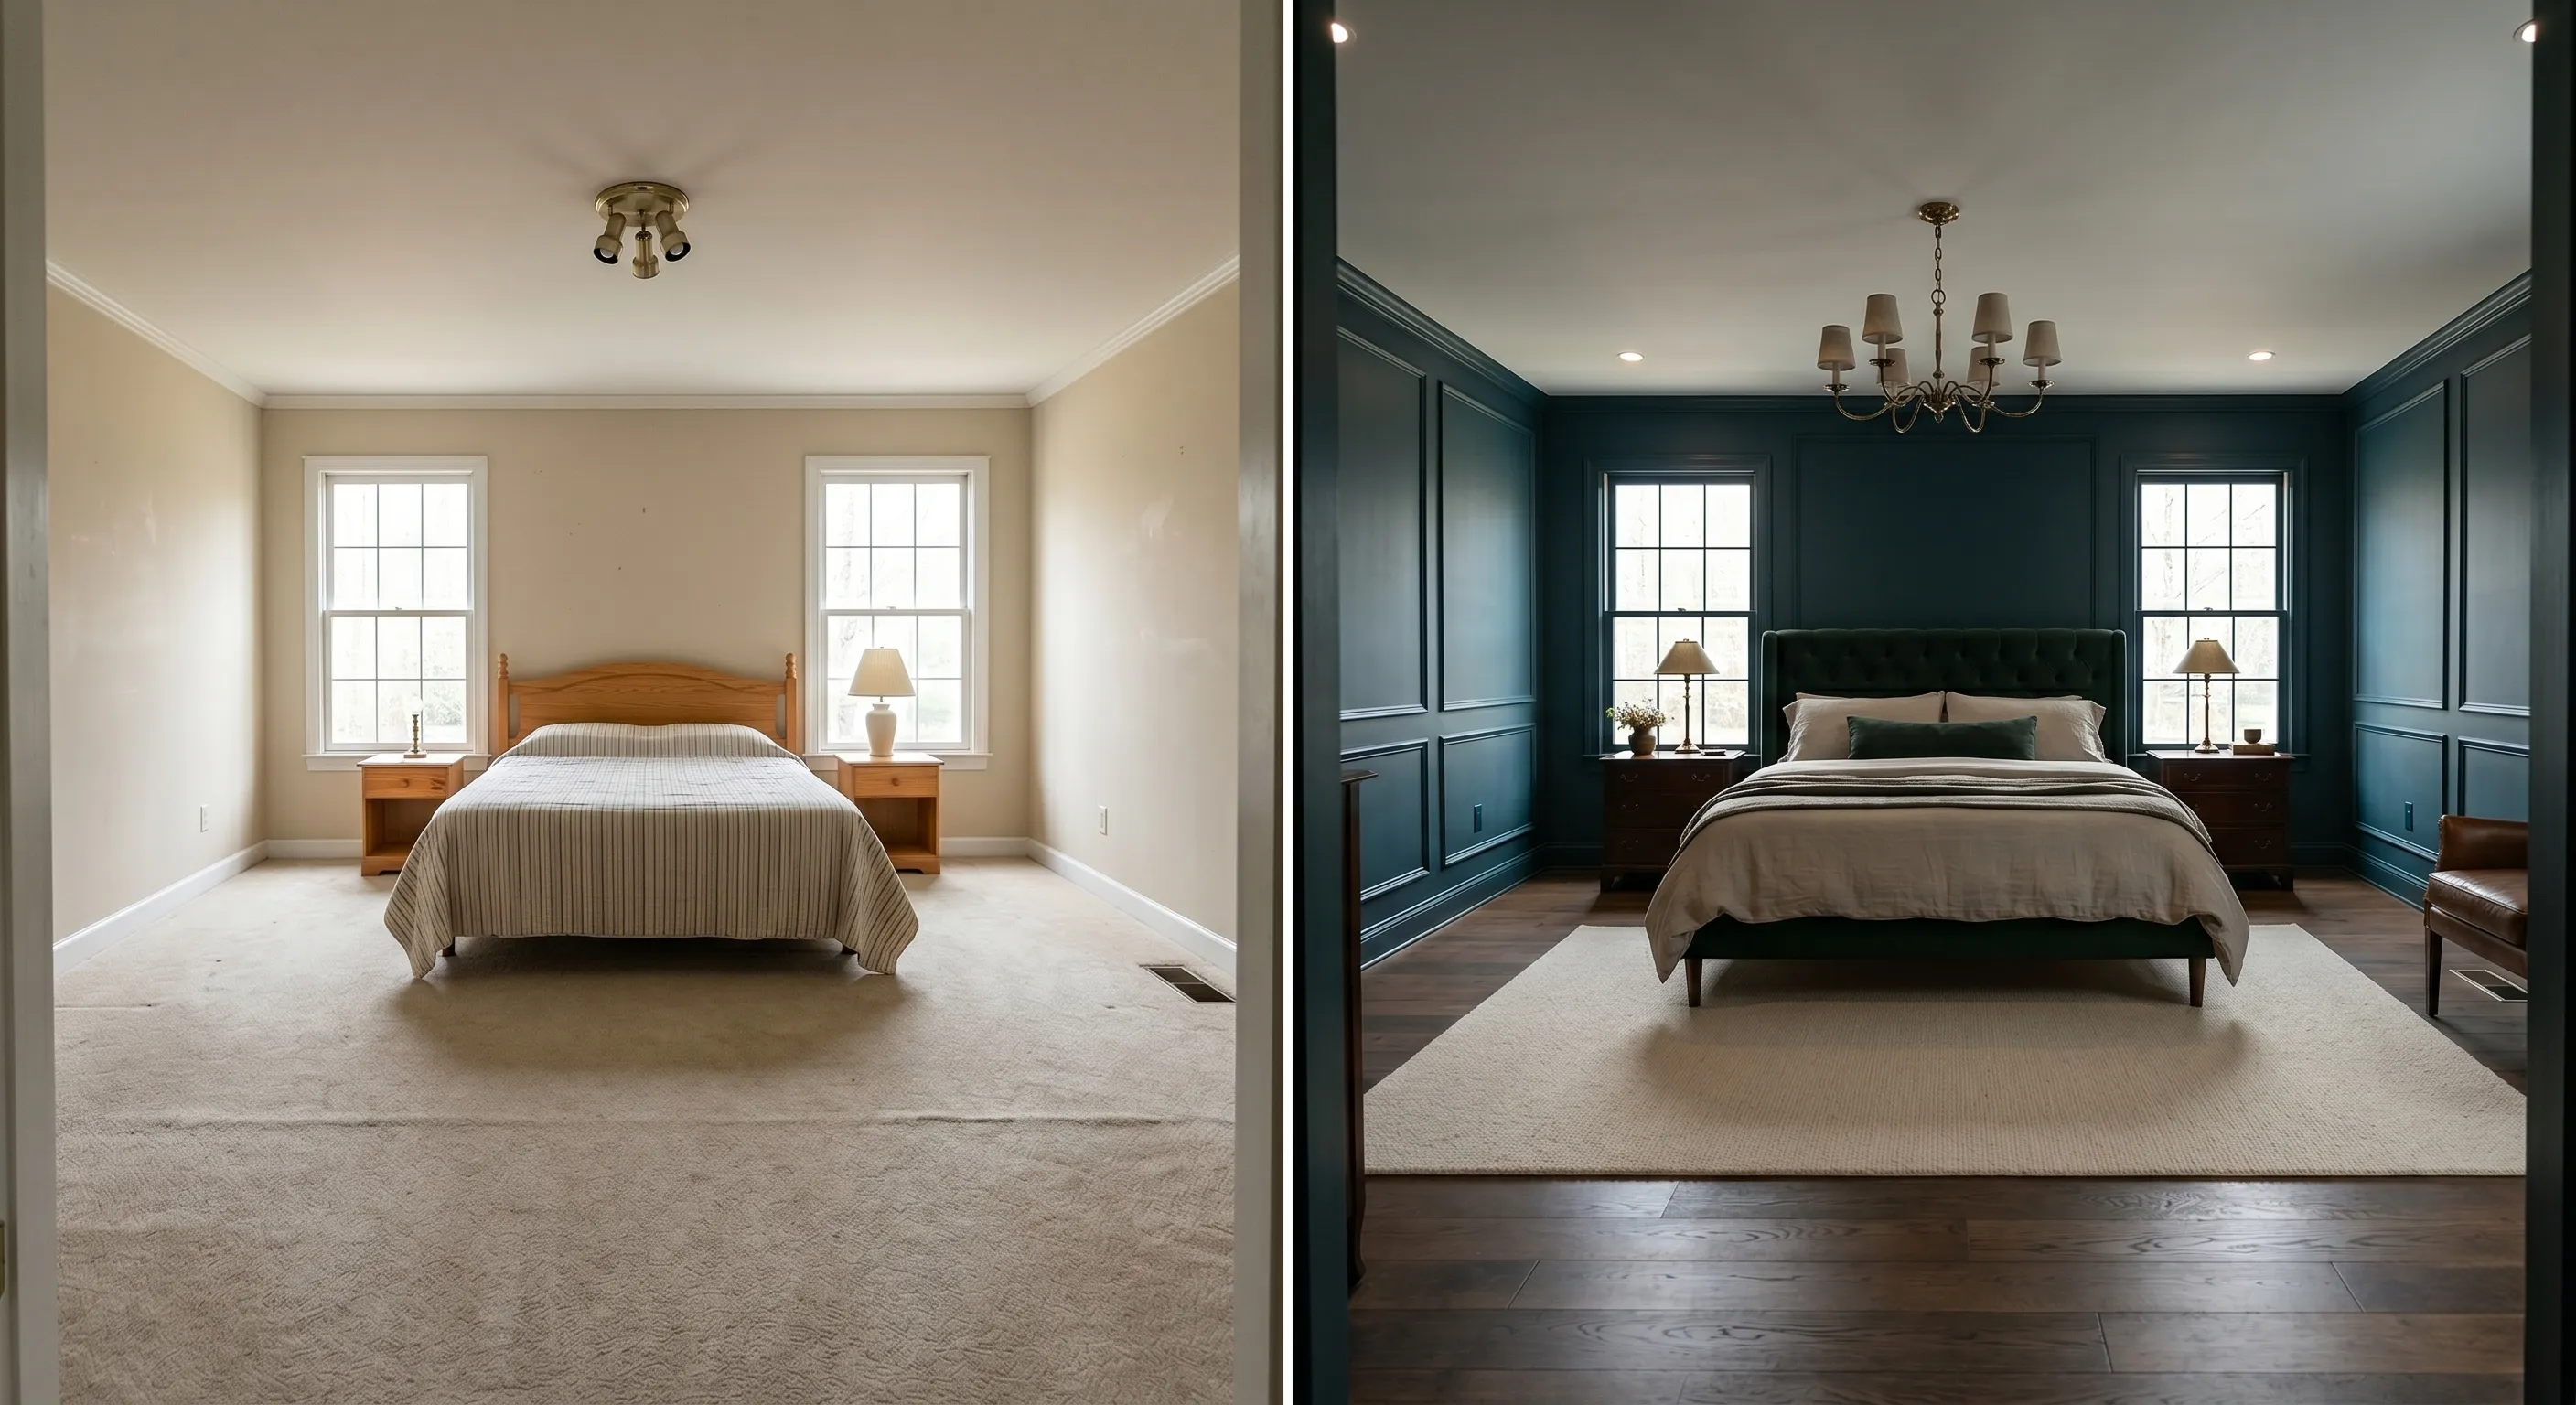
A lot of builder-grade master bedrooms are rectangles of drywall with crown at the top and baseboard at the bottom and nothing in between. The room feels flat no matter how nicely it's furnished, because the walls themselves give the eye nothing to hold onto.
Applied wall molding fixes that by adding rhythm and division to the walls. The before-and-after below uses floor-to-near-ceiling raised panels in deep navy, which is the dramatic end of the spectrum. There are gentler versions, like a chair-rail with picture-frame molding below, board-and-batten running the lower third of the wall, or a grid of square panels behind the bed. None of this requires moving a wall or touching the structure. It's the difference between a room that feels builder-grade and a room that feels designed, and a good finish carpenter can knock it out in a week.
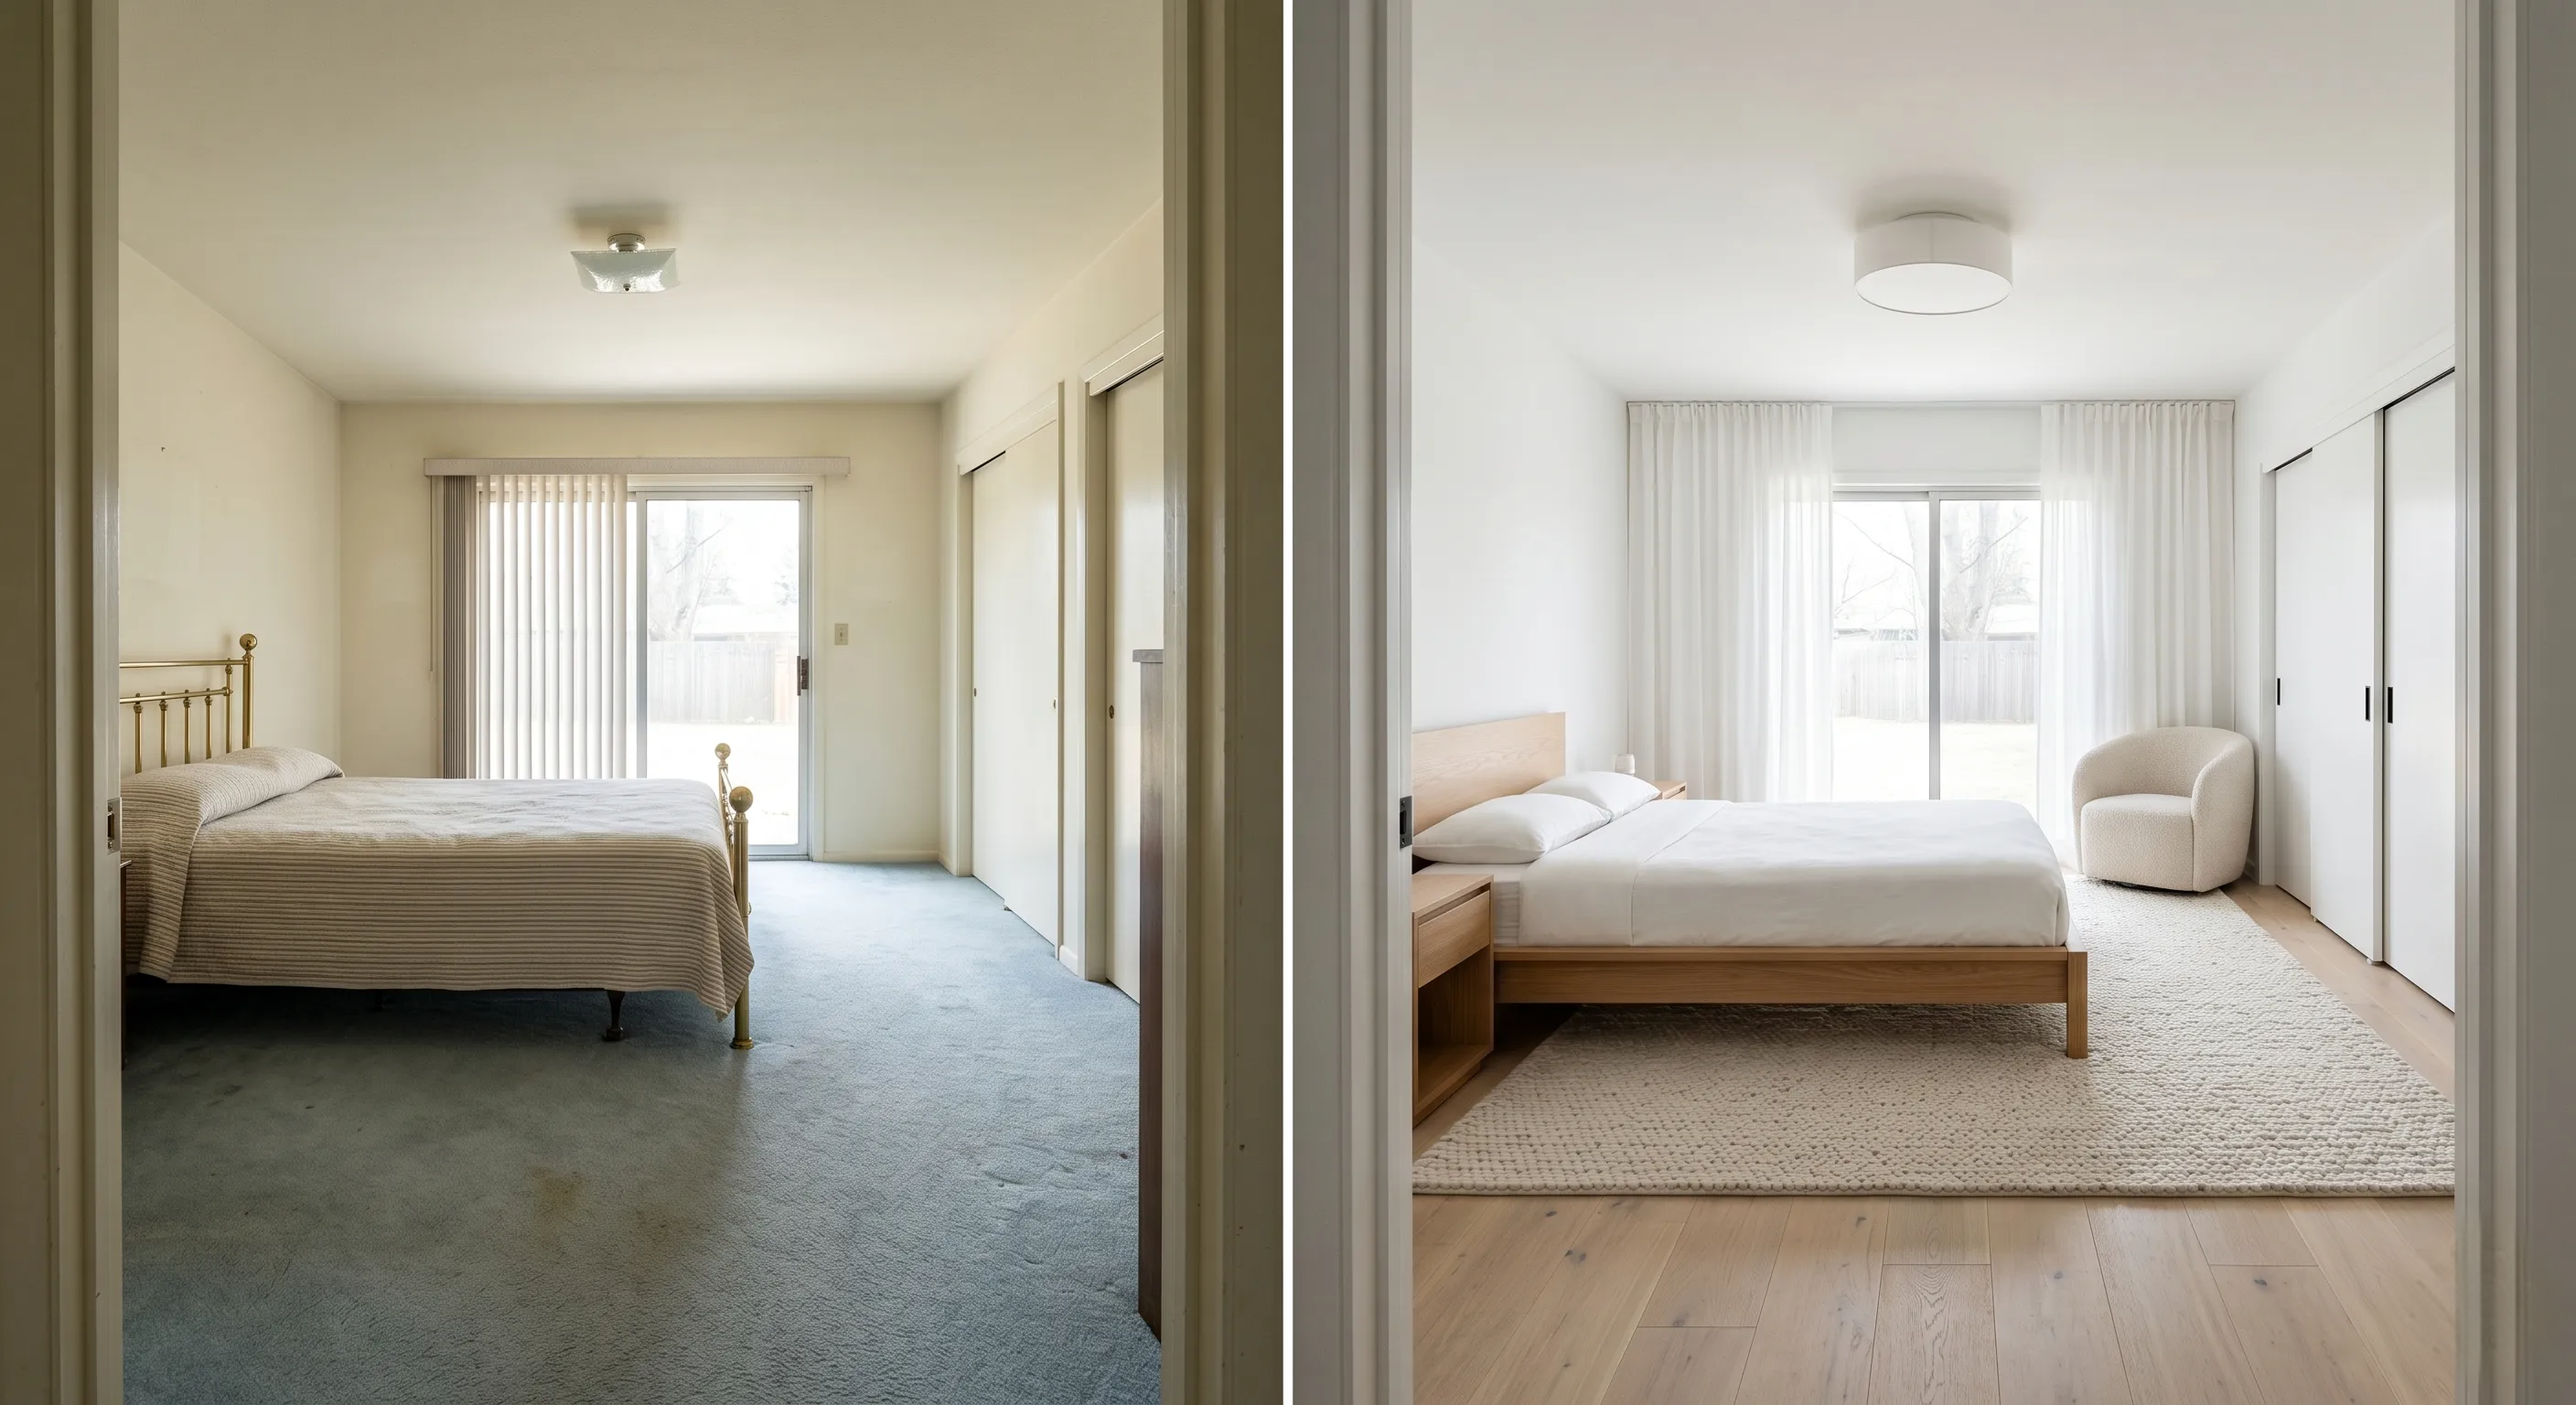
Some master bedrooms don't need more, they need less. The before-and-after below strips a tired room down to almost nothing: white walls, pale oak floors, sheer drapery, and a simple wood platform bed.
You don't have to go that far to get the benefit. Pulling out a heavy valance, swapping vertical blinds for sheers, or replacing a busy duvet with white linen all work in the same direction. A master bedroom is one of the few rooms in a house where less is almost always more, because the room's job is to help you stop, not to entertain you.
Strategies on how to create—and maintain—a minimalist bedroom aesthetic include:
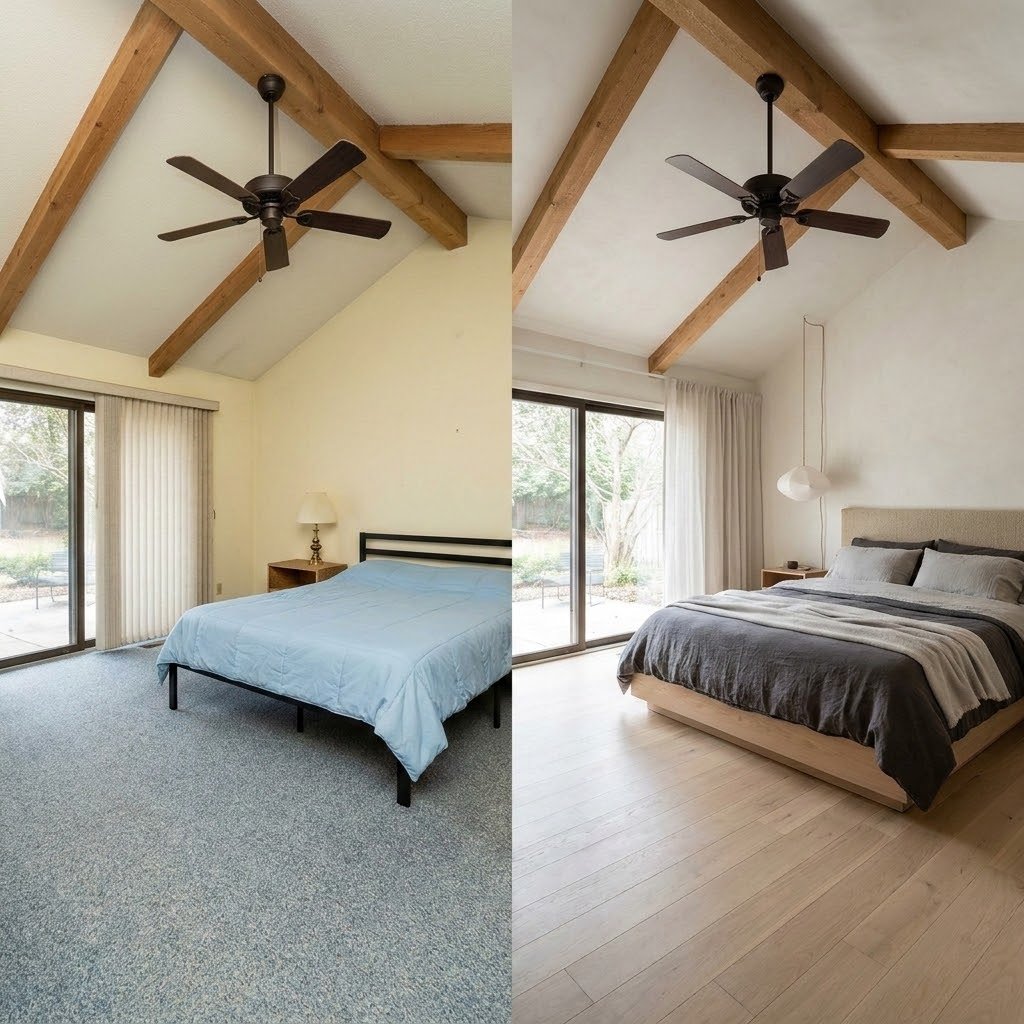
If your bedroom already has something special, like original beams or a beautiful old fireplace, the renovation question changes from adding a focal point to protecting one.
The before-and-after below has gorgeous exposed wood beams that were muted by yellowed walls, blue carpet, and a black metal bed. The renovation whited out the walls, swapped to pale oak floors, and chose an upholstered bed in a quiet neutral.
The same principle applies to any inherited feature. Build the rest of the room around it in colors and materials that recede, and let the hero be the hero.
Design a Home That’s Uniquely Yours
Block can help you achieve your renovation goals and bring your dream remodel to life with price assurance and expert support.
Get Started
Look at enough remodeled master bedroom before-and-afters and a pattern emerges. The "afters" almost always include three things: the carpet is gone, the builder flush-mount is gone, and the walls have been given something to do, whether that's a color, a paneling treatment, or an accent wall. Skip any one of those, and the transformation reads as a refresh. Hit all three, and you have the kind of before-and-after worth photographing.
Most of the transformations above involve work that benefits from a licensed general contractor, including flooring replacement, electrical changes for new lighting, and fireplace refacing. Block matches each project with vetted local contractors who compete for the work, and the platform manages payments through a secure progress-based system so contractors are paid as the work gets done.
If your renovation is still months away, that's actually ideal. Start in Block's Renovation Studio to explore styles and get a real estimate before you commit.
Remodel with confidence through Block

Connect to vetted local contractors
We only work with top-tier, thoroughly vetted contractors

Get expert guidance
Our project planners offer expert advice, scope review, and ongoing support as needed

Enjoy peace of mind throughout your renovation
Secure payment system puts you in control and protects your remodel


Renovate confidently with Block
Easily compare quotes from top quality contractors, and get peace of mind with warranty & price protections.
Before and After
Limewash Brick Before and After: Photos and What to Know
06.10.2026

Before and After
Budget Small Kitchen Remodel: Before and After Ideas
06.08.2026

Before and After
Mid-Century Modern Exterior Before and After Ideas
06.04.2026

Bedroom
Minimum Bedroom Size: Code vs. Livability
06.01.2026

Before and After
1970s Kitchen Remodel Ideas: Before & After Pictures
05.29.2026