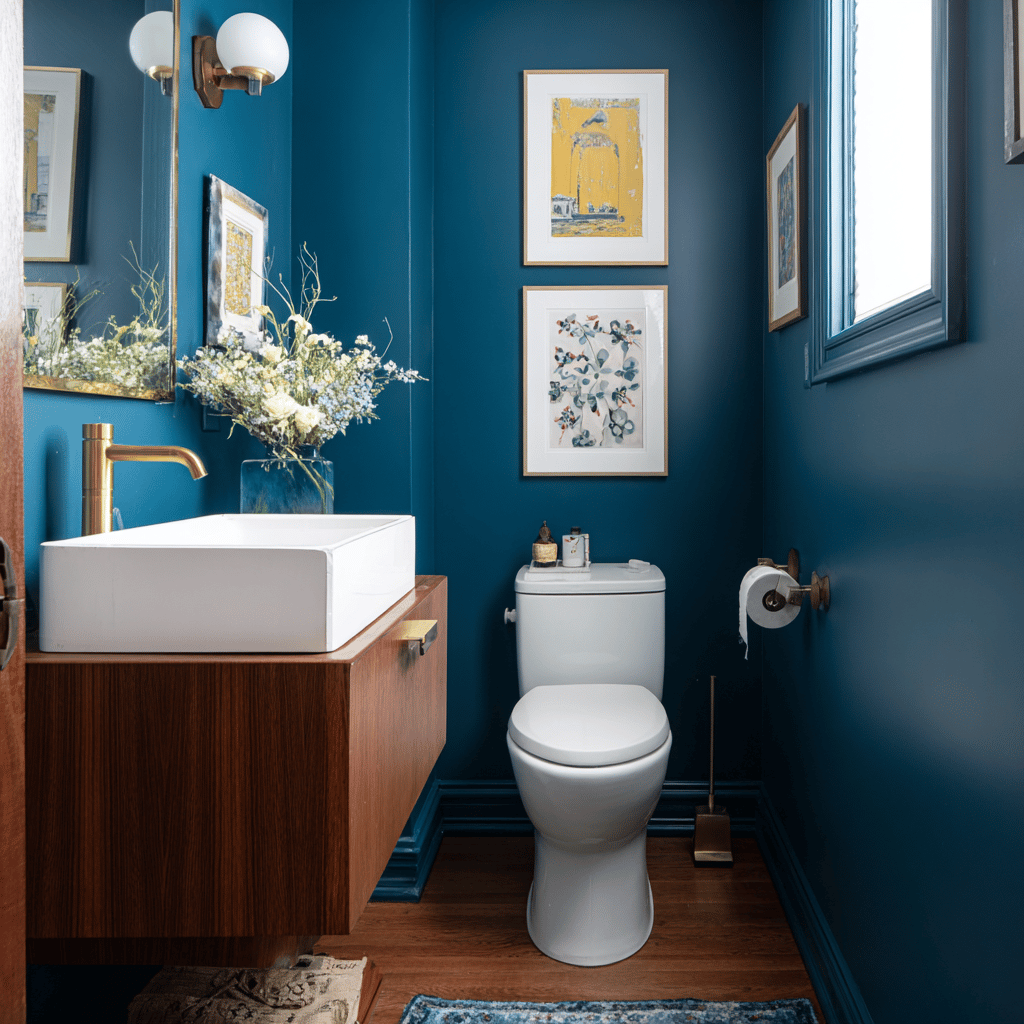
An ADU bathroom has to work harder with less. Whether you're building a detached backyard unit for rental income or converting a garage into a suite for aging parents, the bathroom is one of the most complex and cost-intensive rooms in the project. It needs its own plumbing connections, ventilation, and waterproofing, all packed into a compact footprint.
A well-designed ADU bathroom comes down to making intentional decisions early about the layout and materials so that every element earns its place.
ADU bathroom layout: how small can you go?
Minimum sizes for a three-quarter bath
Most ADU bathrooms are three-quarter baths: a toilet, sink, and shower, with no bathtub. This is the most practical ADU bathroom layout for the majority of use cases, especially when you're working within a 400- to 800-square-foot unit.
So how small can that bathroom actually be? Here are the key dimensions to know:
- Minimum floor area for a three-quarter bath: 26 to 30 square feet. A common configuration is roughly 5x6 or 6x6; both can fit a shower, toilet, and vanity with code-compliant clearances.
- Toilet clearance: At least 15 inches from the center of the bowl to any side wall or fixture, and a minimum of 21 inches of clear floor space in front.
- Shower interior: A minimum of 30 inches by 30 inches (900 square inches), though 36 by 36 inches is significantly more comfortable for daily use.
- Door width: At least 24 inches, though 32 inches is recommended. Go with 36 inches if you're designing for accessibility.
- Ceiling height: A minimum of 6 feet 8 inches over all fixtures, including the shower area.
These are code minimums, not comfort recommendations. If your ADU floor plan allows it, even a few extra inches in each direction will make the bathroom noticeably more pleasant to use.
For a deeper look at bathroom dimensions and how to make the most of a small footprint, Block Renovation's guide to minimum bathroom sizes breaks down clearances, fixture spacing, and layout options in detail. If you have slightly more square footage in your ADU, look at our 8x5, 7x7, and 6x8 bathroom floor plans.
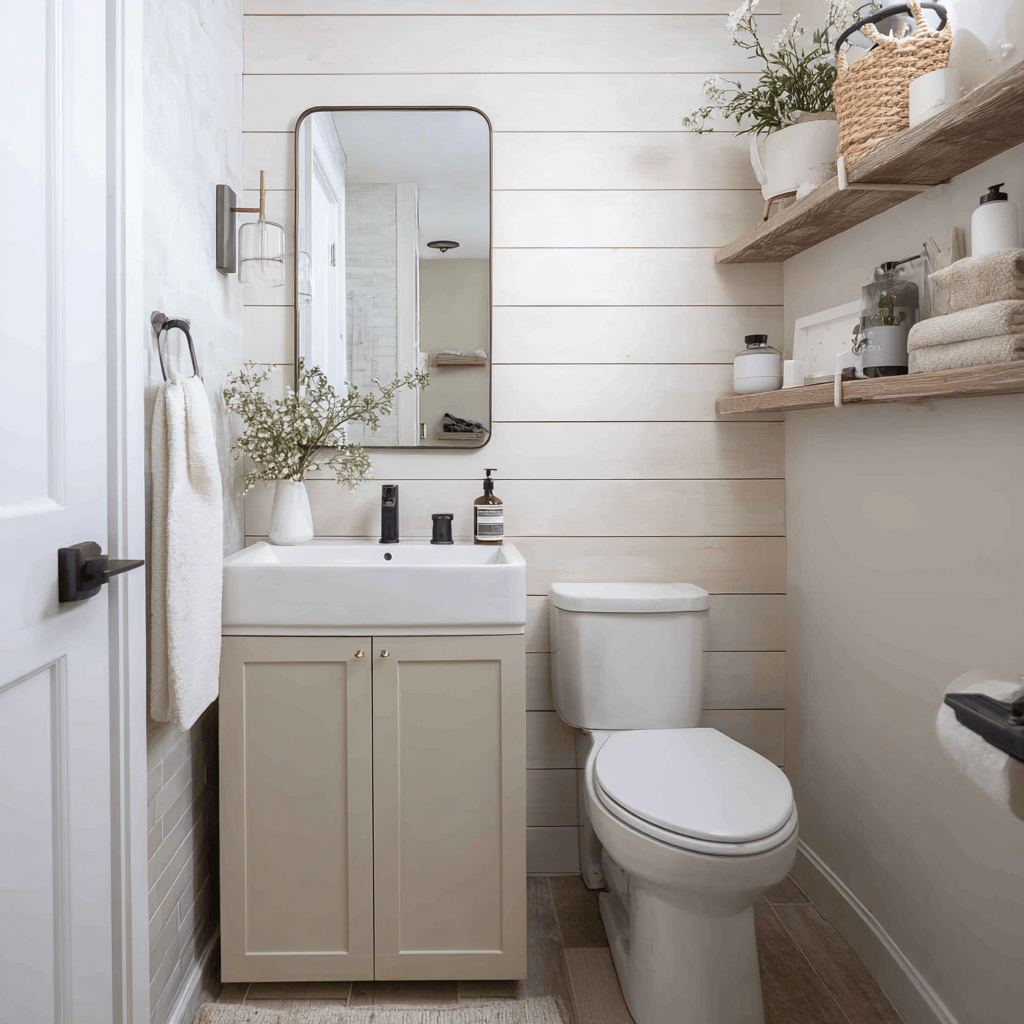
Ways to make a small ADU bathroom layout work
- Choose a side layout over a center layout. Placing all fixtures along one wall consolidates plumbing to a single wet wall (which reduces cost) and leaves a clear path of movement through the room. This works especially well in long, narrow ADU bathrooms common in garage conversions.
- Use a corner shower to free up the center of the room. A neo-angle or curved quadrant shower enclosure tucks into one corner, leaving adjacent walls open for the vanity and toilet. Ditching the tub saves 10 to 15 square feet.
- Swap the swing door for a pocket or sliding door. A standard bathroom door needs roughly 10 square feet of clearance to open. A pocket door reclaims that space entirely. Plan for it during framing, because retrofitting one later is significantly more expensive.
- Add a recessed shower niche instead of a hanging caddy. Built between wall studs, a niche holds toiletries without protruding into the shower footprint. The same applies to medicine cabinets: recessed beats surface-mounted in a tight bathroom.
- Use an oversized mirror. A trendy mirror that spans the full width of the vanity wall reflects light and visually doubles the perceived depth of the room. As a bonus, it’s a decorative piece that simultaneously provides a function.
- Go with large-format tiling. Tiles 12 by 24 inches or larger create fewer grout lines, which means fewer visual interruptions. The effect is even stronger when you carry the same tile from floor to wall.
- Go vertical with storage. In a small ADU bathroom, floor space is too valuable to give up to freestanding shelves or cabinets. Tall, narrow medicine cabinets, open shelving above the toilet, and hooks on the back of the door all take advantage of wall space that would otherwise go unused.
- Add a window in the shower if your layout allows it. Natural light makes a small bathroom feel noticeably larger, and a shower window does double duty by also improving ventilation. A frosted or obscured glass pane maintains privacy while letting in daylight.
- Mount the vanity on the wall. A floating vanity exposes more floor, which makes the room feel larger and creates storage space underneath.
Choosing the right materials for your ADU bathroom
The bathroom is one of the most expensive rooms per square foot in any ADU build. Plumbing and waterproofing add up fast, so being strategic about where you invest and where you economize makes a real difference.
Where to invest
- Shower tile and waterproofing. This is the hardest-working surface in the bathroom. Quality tile and proper waterproofing (a membrane system like Schluter or RedGard behind the tile) protect against moisture damage and costly remediation. Not the place to cut corners.
- Faucets and showerheads. Good hardware gets used every day and has a noticeable impact on how the bathroom feels. Solid-brass internals outlast plastic-bodied alternatives.
- Exhaust fan. A properly rated exhaust fan protects every other material decision you've made. More on this below.
Where to save
- Floor tile outside the wet area. Durable porcelain tile in the $3 to $6 per square foot range can look great and hold up well. Save the premium tile for the shower walls.
- Paint instead of tile on non-wet walls. Painting above the shower line or around the toilet area, rather than tiling floor to ceiling, can save $500 to $1,500. Use a high-quality, mildew-resistant bathroom paint.
- Ready-to-assemble vanities. A well-chosen RTA vanity can look nearly identical to a custom piece at a fraction of the cost. Look for solid wood or plywood construction (avoid particleboard in a wet environment) and swap out the included hardware for something more substantial.
- Standard-size fixtures over custom. A 30-by-30-inch or 36-by-36-inch shower base will be significantly less expensive than a custom-poured pan. Custom sizing drives up both material and installation costs.
- Chrome or brushed nickel hardware. Matte black and brushed gold are popular, but chrome and brushed nickel cost less, are widely available, and age well.
Understanding the practicalities of small ADU bathrooms
A beautiful ADU bathroom that doesn't meet code or function well day-to-day isn't a success. These are the practical details to get right before you finalize your design.
Ventilation
Every ADU bathroom needs a mechanical exhaust fan, and in most jurisdictions it's required by code regardless of whether the room has a window. This is especially important in small, enclosed ADU bathrooms where moisture builds up fast.
- Sizing: The standard rule is 1 CFM (cubic foot per minute) per square foot of floor area, with a minimum of 50 CFM.
- Ducting: The fan must vent to the exterior of the building, not into an attic or crawl space. In detached ADUs, plan the duct run during framing so it takes a short, direct path through the roof or an exterior wall.
- Switching: Many codes now require the exhaust fan to be on a separate switch from the light, or controlled by a humidistat that keeps it running after the light is turned off. Check your local requirements.
Undersizing ventilation is one of the most common mistakes in ADU construction. Trapped moisture leads to mold, peeling paint, and premature deterioration of finishes.
"My mom's ADU bathroom is maybe forty square feet," says Margo Stein, a Los Angeles homeowner. "Our builder suggested a small window in the shower, positioned high enough that she can crack it to let steam out without worrying about Peeping Toms. Even something as simple as that goes a long way to maintaining the space."
Plumbing and utility hookups
Plumbing is typically the single largest cost driver in an ADU bathroom, and where you place the bathroom within your unit can swing your budget by thousands of dollars.
- Proximity to existing sewer and water lines. In a detached ADU, every additional foot of distance between the bathroom and the main sewer lateral adds to excavation and piping costs. Position the bathroom on the side of the unit closest to the main house's utility connections.
- Shared wet walls. If your ADU includes both a bathroom and a kitchen (which most do), placing them back-to-back consolidates supply and drain lines into one run. This is standard ADU design practice and keeps plumbing costs down.
- Water heater considerations. A tankless (on-demand) water heater is popular for ADUs because it takes up minimal space. However, gas tankless units may require specific venting, and electric units may need a dedicated high-amperage circuit. Confirm your electrical panel capacity with your contractor before committing.
- Sewer connection fees. Connecting an ADU to the public sewer may involve impact or connection fees ranging from a few hundred to several thousand dollars. Some jurisdictions waive these for ADUs under a certain size, so research your local policies early.
Waterproofing
In any bathroom, waterproofing is essential. In a small ADU bathroom with a curbless shower or wet room design, it's even more critical because water has less room to be contained.
- Shower walls and floor: A waterproof membrane (liquid-applied or sheet) should cover the entire shower area before tile is installed.
- Curbless showers and wet rooms: If the entire floor slopes to a drain, the membrane must extend across the full bathroom floor and up the walls to the height specified by your local code.
- Floor-to-wall transitions: These joints are the most vulnerable to leaks. Make sure your contractor uses a waterproofing system designed to bridge these transitions.
Designing your ADU bathroom for the end user
Who will actually use this bathroom every day? The answer should shape your ideas for fixture choices and the layout.
ADU bathrooms for aging parents or multigenerational living
If your ADU is an in-law suite, accessibility should be part of the original design rather than a future retrofit. Building it in from the start is far less expensive than tearing out finished work later.
- Curbless shower entry. A zero-threshold shower eliminates a tripping hazard and allows easy access for anyone using a walker or wheelchair. It requires waterproofing across the entire floor, so plan for it early.
- Blocking for grab bars. Even if you don't install grab bars now, adding solid wood blocking behind the drywall during framing costs almost nothing and makes future installation simple.
- Comfort-height toilet. A 17- to 19-inch seat height (versus the standard 15 inches) makes sitting and standing easier for older adults.
- Lever-style faucet handles. Levers require less grip strength than knobs, which matters for anyone with arthritis or limited hand mobility.
- Wider doorway. Aim for at least 32 inches of clear opening, or 36 inches if the occupant uses a wheelchair. A pocket door avoids the swing clearance issue entirely.
- Non-slip flooring. Choose a tile with a textured surface or a coefficient of friction rating of 0.5 or above when wet.
- Layered lighting. Aging eyes need more light. Combine bright overhead illumination with task lighting at the vanity mirror.
ADU bathrooms for a rental property
If your ADU will generate rental income, your bathroom decisions should prioritize durability and broad appeal.
- Neutral finishes. White or light gray tile, chrome or brushed nickel hardware, and a clean white vanity attract the widest range of renters and photograph well for listings.
- Durable, low-maintenance materials. Porcelain tile over natural stone (stone requires periodic sealing). Quartz countertops over marble. Semi-gloss or satin paint that wipes clean easily.
- One strategic upgrade. If your budget allows a single splurge, a rainfall showerhead or high-quality shower tile can elevate the feel of the entire unit and may justify a higher rental price.
- Easy-to-replace components. Standard fixture sizes and finishes mean replacing a faucet or showerhead down the road is straightforward. Avoid specialty items that require special ordering.
- Good ventilation and lighting. These are details renters notice. A bathroom that feels bright and dry signals quality.
A regulatory note worth knowing
When building an ADU in California and other states with strict regulation, the bathroom configuration of a junior ADU (JADU) carries regulatory weight. As of January 2026, a JADU with its own private bathroom is no longer subject to owner-occupancy requirements, meaning the property owner doesn't need to live on-site. A JADU that shares a bathroom with the main house still triggers that requirement. If you're planning a JADU and weighing whether to add a dedicated bathroom, this distinction could have real financial implications for your rental strategy.
Visualize your ADU bathroom with Block's Renovation Studio
If you're still weighing ADU bathroom ideas, testing different layouts, or trying to understand how tile choices affect your total budget, Block Renovation's free bathroom visualizing tool can help you move from inspiration to a concrete plan.
Our Renovation Studio lets you experiment with different design directions and see how material choices impact your cost estimate in real time, before you've talked to a contractor.
For ADU homeowners, this is especially useful because bathroom decisions are tightly interconnected: layout drives plumbing cost, which drives overall budget, which may determine your tile selection.
Find the right contractor for your ADU bathroom with Block Renovation
Plumbing and waterproofing are skilled trades where execution quality matters enormously, and where mistakes are expensive to fix after the fact.
Block Renovation connects homeowners with thoroughly vetted, licensed contractors matched to your project type and location. You'll receive detailed, comparable proposals with line-item pricing, and your project planner can help you evaluate scopes and spot gaps before construction begins. Progress-based payments and a one-year workmanship warranty from every contractor in the network.

Written by
Cheyenne Howard
Cheyenne Howard
Cheyenne Howard is a Project Planner at Block Renovation who brings a thoughtful, organized approach to renovation planning. With a strong attention to detail and experience supporting a wide range of projects, she works closely with clients to create a smooth and positive planning experience.


