




ADUs
How Much Does It Cost to Build or Remodel a Guest House?
08.28.2026
05.26.2026


In This Article
A 400 square foot ADU is the threshold where small dwellings start to feel like real homes. It's enough room for a separate bedroom, a real bathroom, a working kitchen, and a living area you'd actually want to spend time in. It's also small enough to slot into a backyard or above an existing garage.
Plenty of project types land in this size range:
The four ADU floor plans below show how different layouts handle the same 400 sq ft constraint.
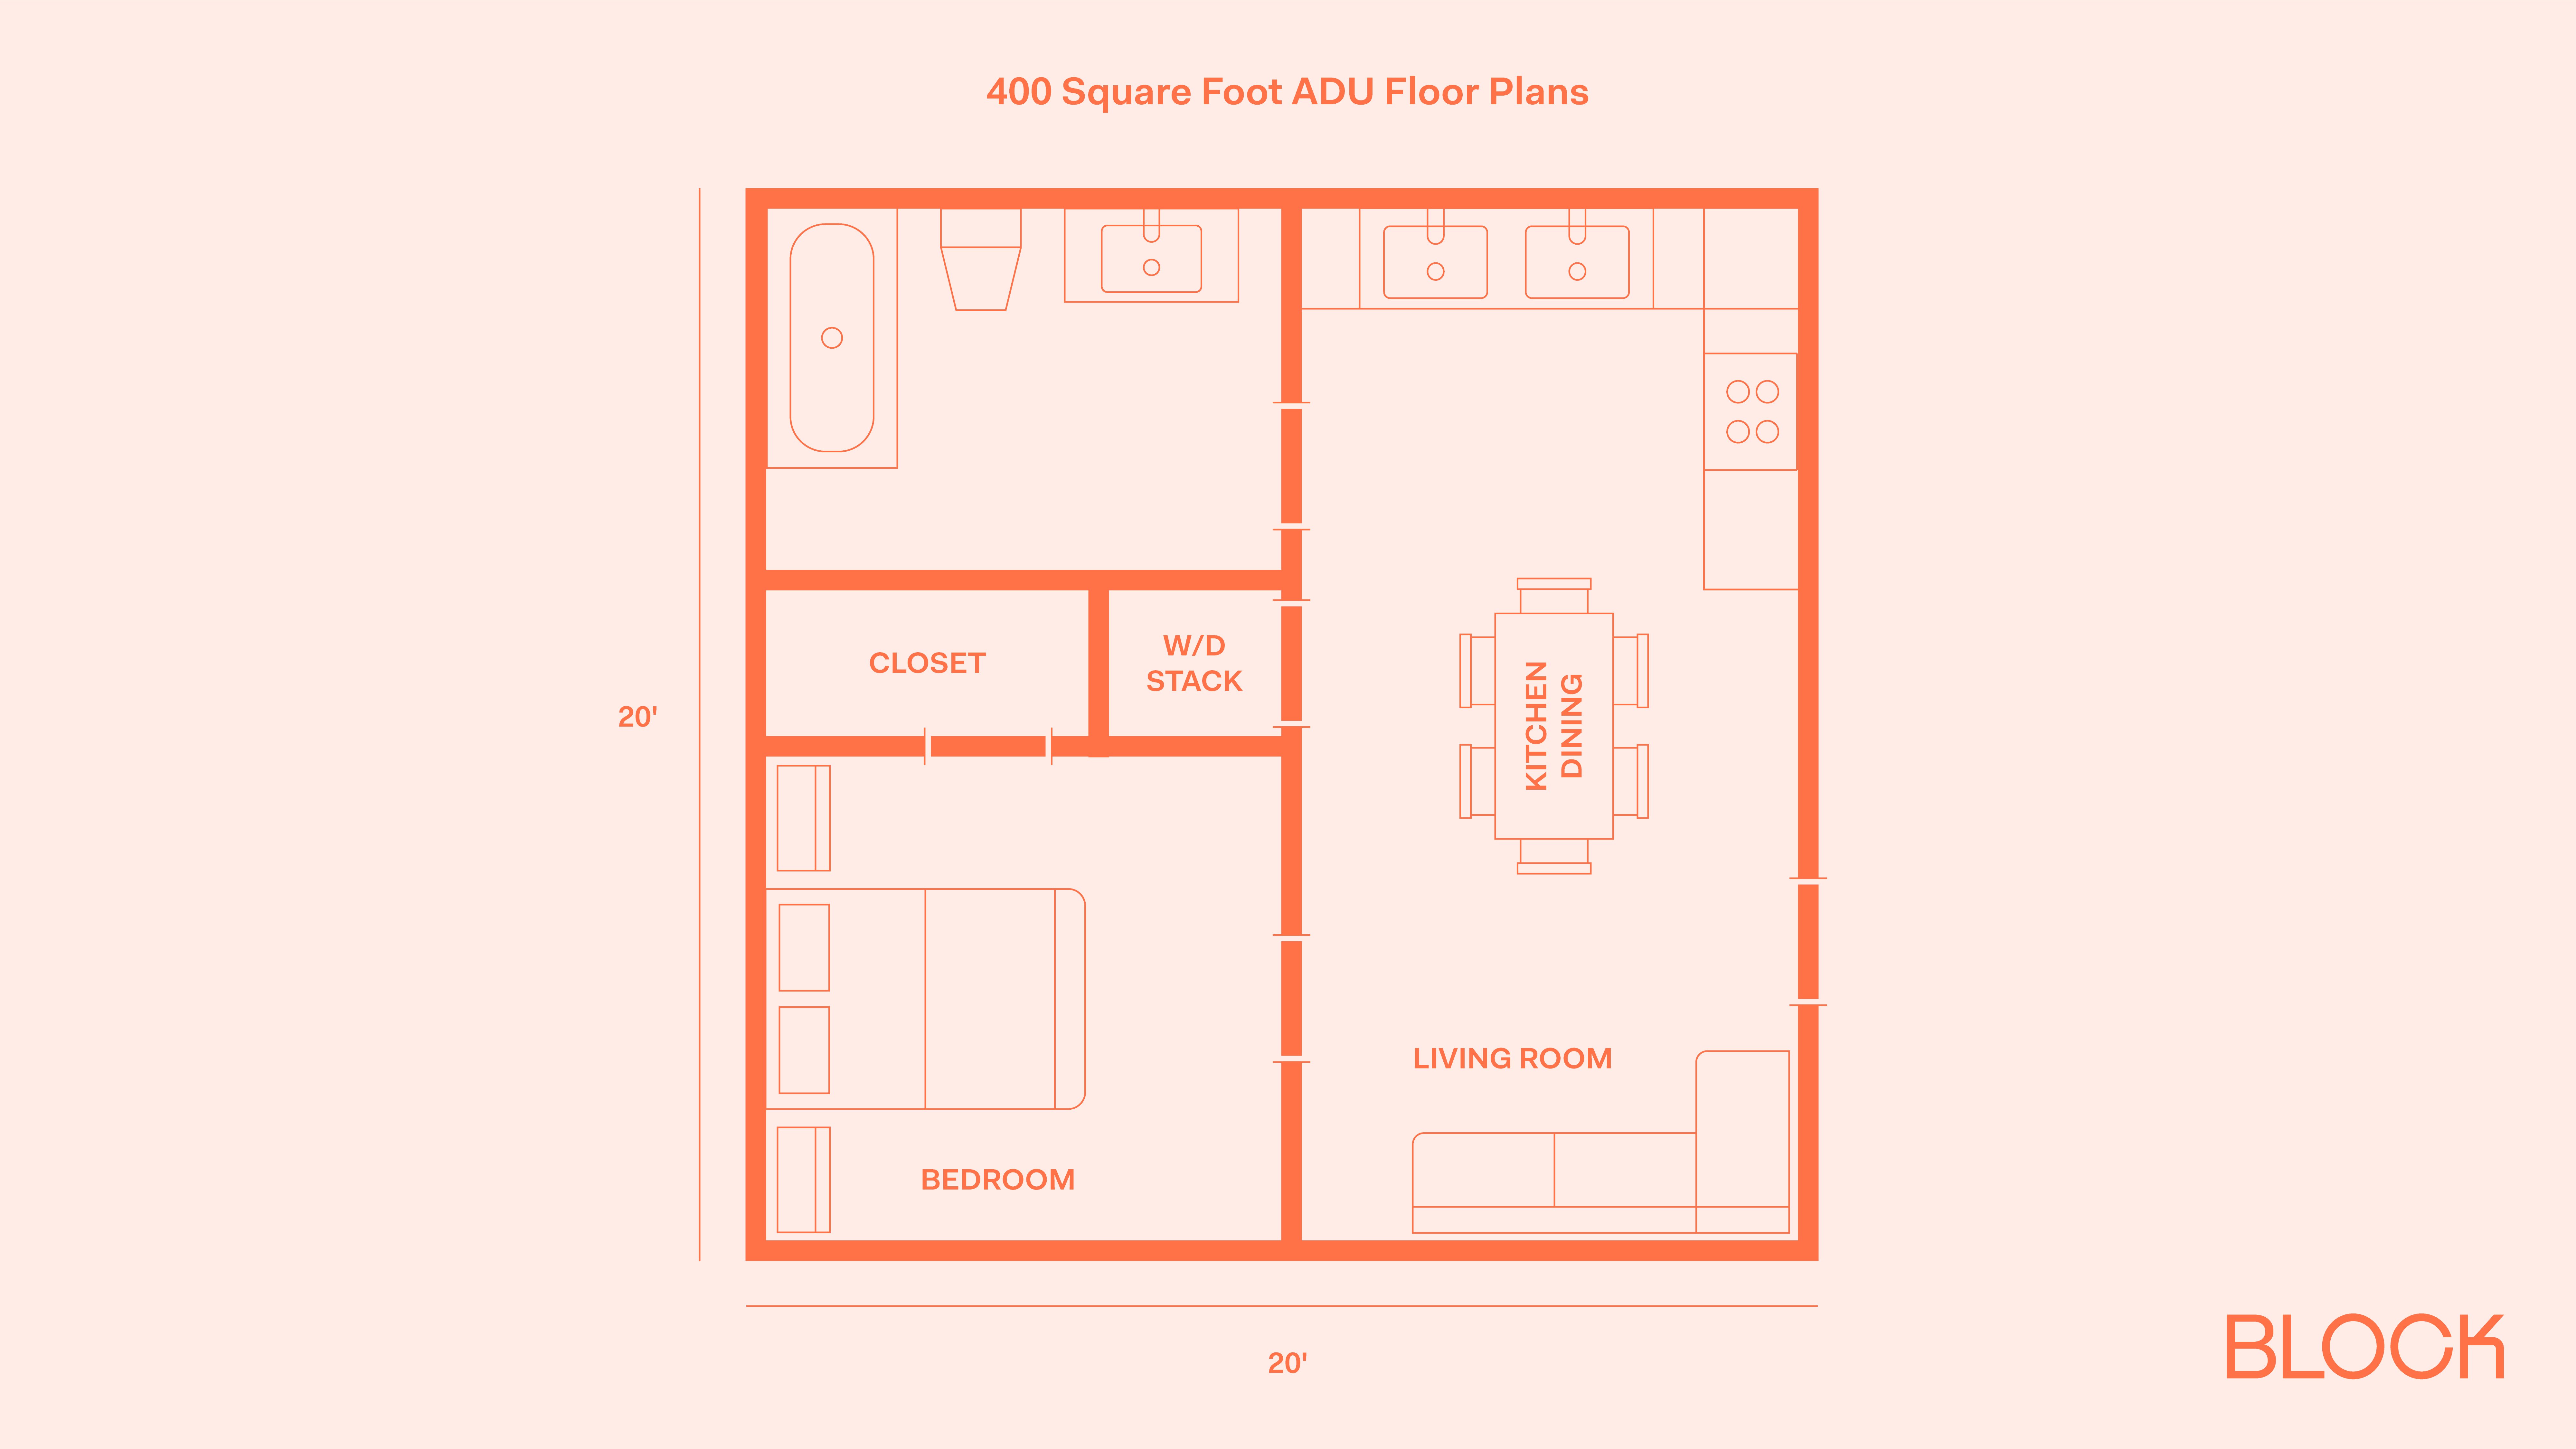
This plan treats the ADU as a permanent residence from day one. The unit splits cleanly in half. The left side stacks four small zones from top to bottom: a full bathroom with tub, toilet, and sink; a closet; a stacked washer/dryer; and a separated bedroom. The right side holds the kitchen, dining, and living areas in one continuous space.
Bathroom fixtures and the kitchen sink all sit along the top wall, which means one consolidated wet wall instead of two. That cuts thousands from rough-in costs. The L-shaped kitchen extends along the top and down the right wall, with counter run on both sides of the cooktop and the sink.
The bedroom is roughly 9 by 8 feet, which clears the 70 sq ft IRC minimum for a habitable room and the 7-foot minimum dimension. A queen bed fits against the long wall with nightstands on either side.
The closet and stacked washer/dryer are the features that distinguish this plan. Many 400 sq ft layouts skip one or both, which means residents either go without in-unit laundry or carve out space later.
A few choices to make when personalizing this layout:
Best when the ADU will be a primary residence.
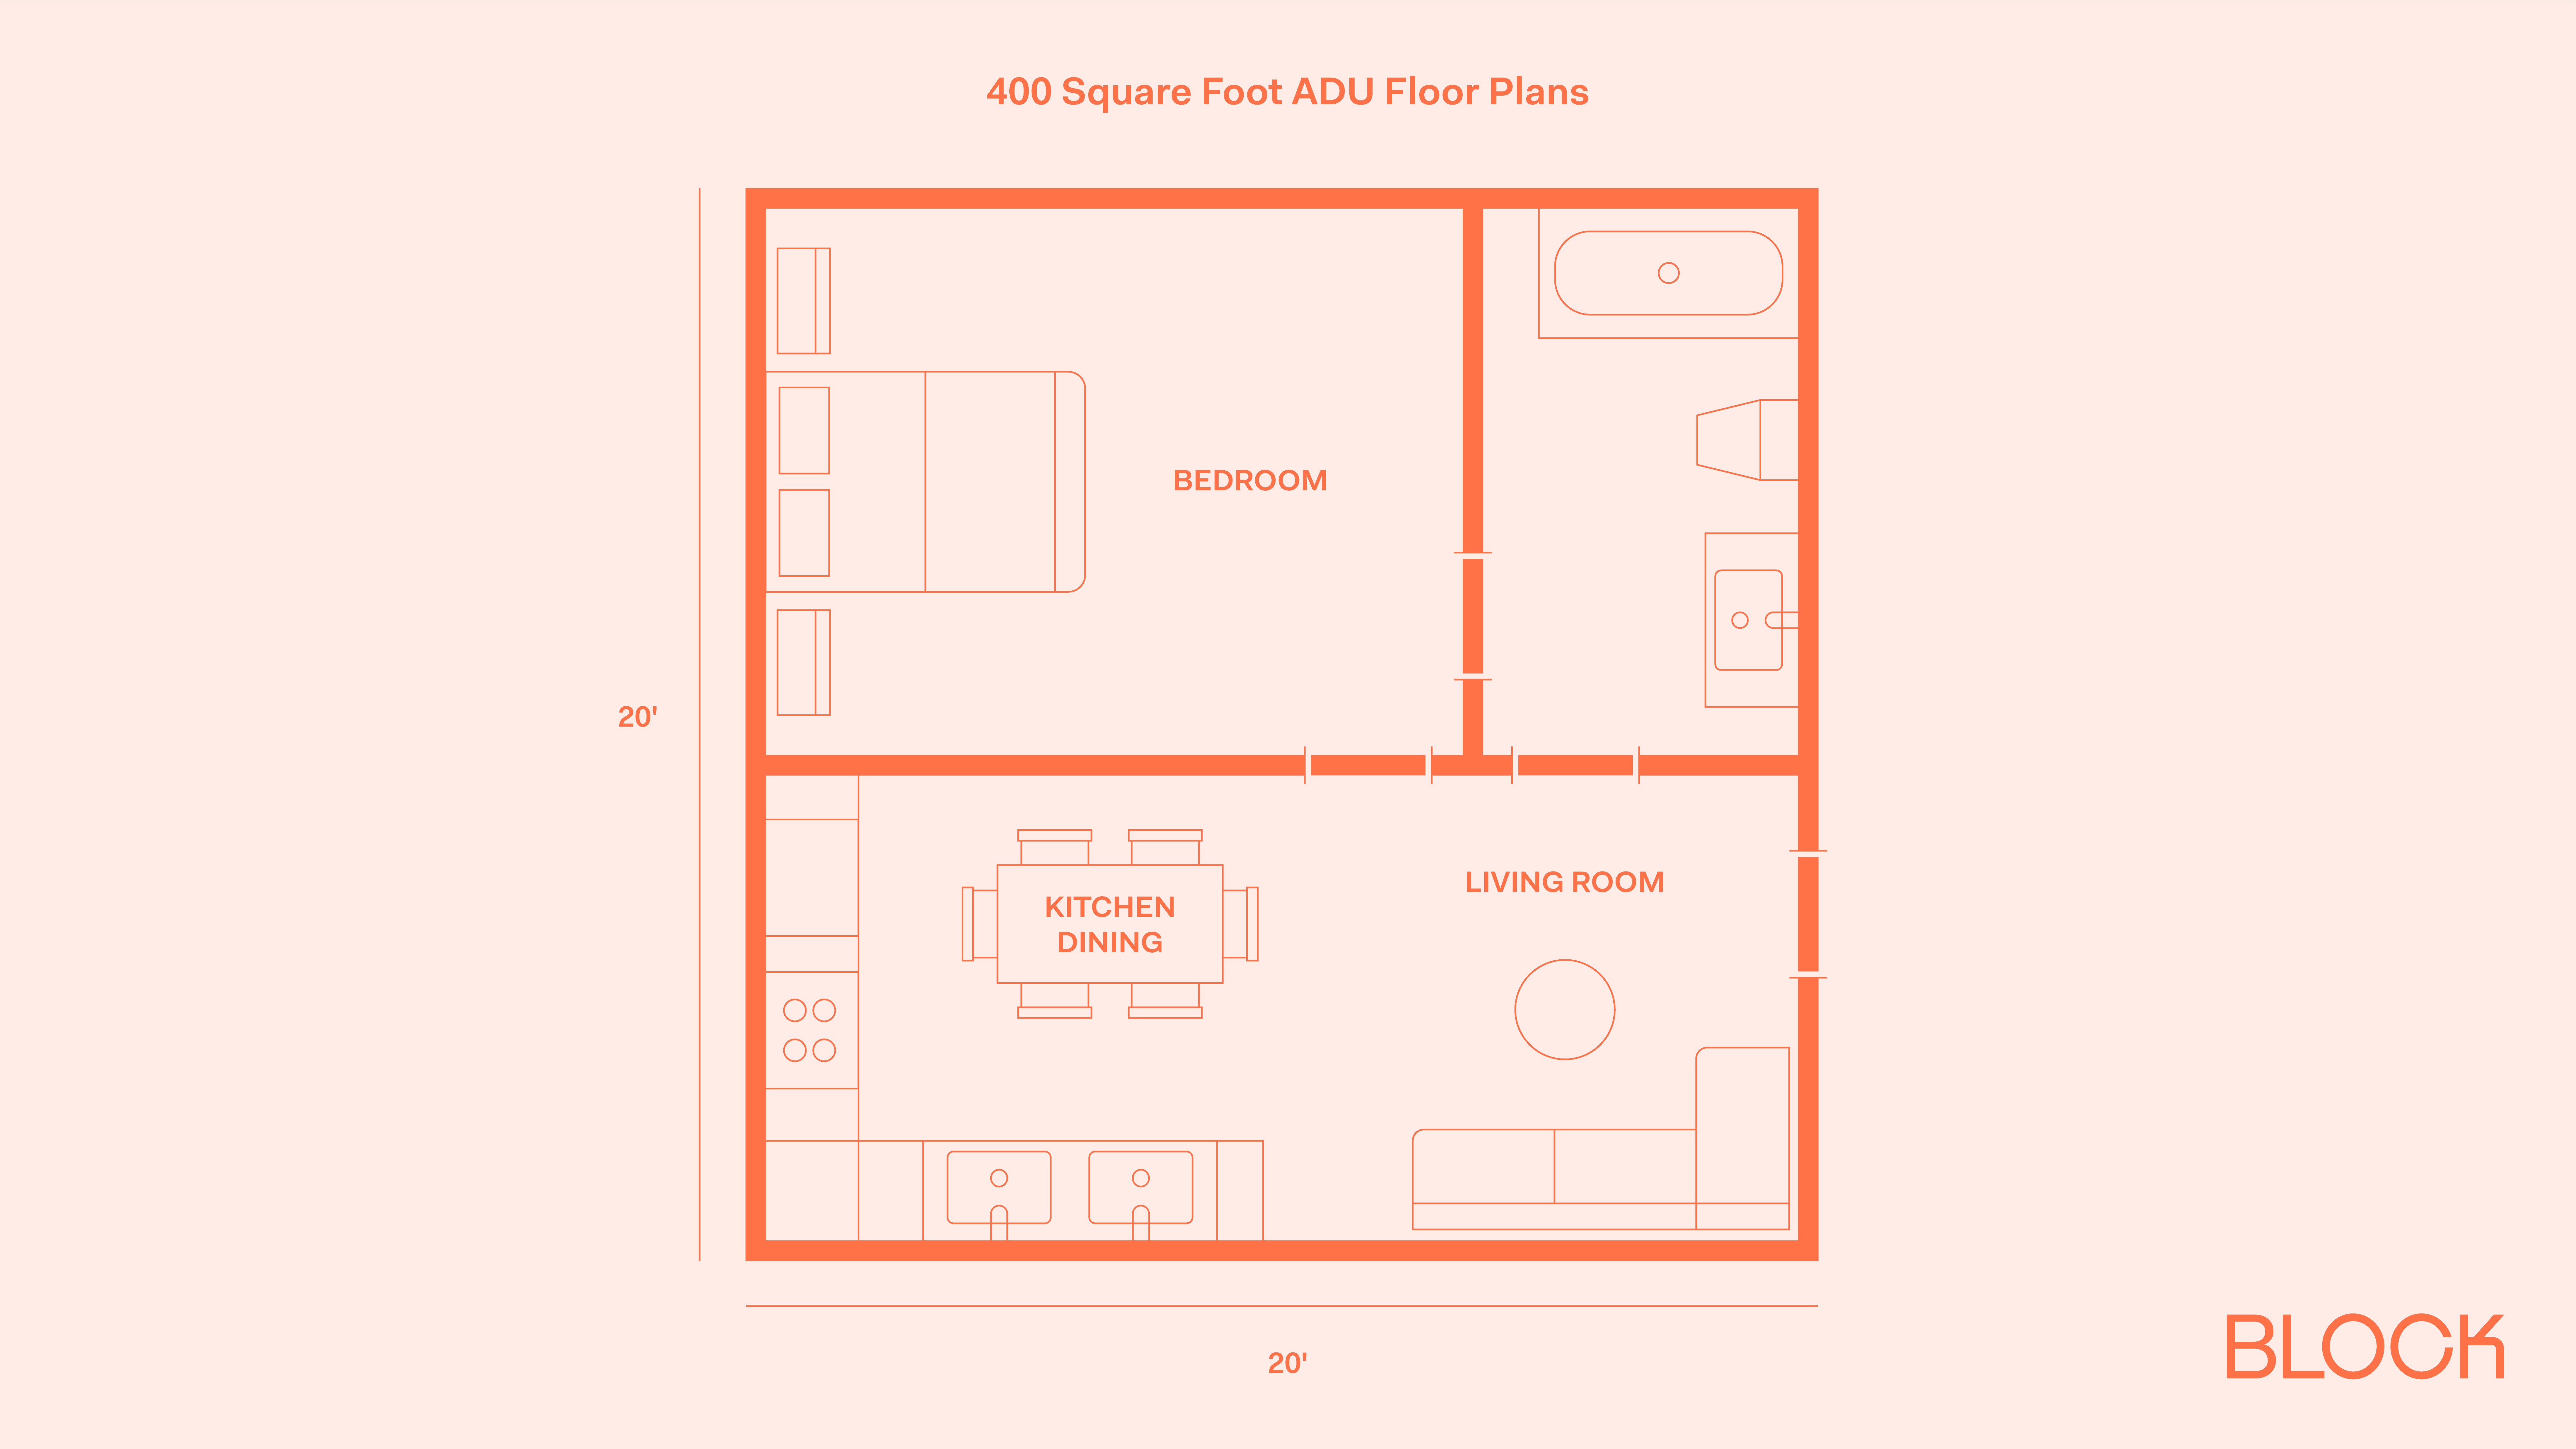
Bedroom and bathroom occupy the top half, and the kitchen, dining, and living areas fill the bottom half. The bedroom is generous at roughly 12 by 10 feet. The bathroom has room for a full tub.
The open lower half feels larger than Plan 1's because there's nothing dividing it. An L-shaped kitchen sits in the bottom-left corner, a four-seat dining table sits center, and the living area runs along the right wall with a sofa, chair, and coffee table. The bedroom-to-bathroom adjacency works well for nighttime use.
This layout splits its plumbing across the unit, with the bathroom in the top right and the kitchen sink in the bottom left. That trades some plumbing efficiency for a more open downstairs and a roomier bedroom.
Window placement on the open lower half will define how this space lives. Two large windows on the south or west wall do more than four small ones scattered around.
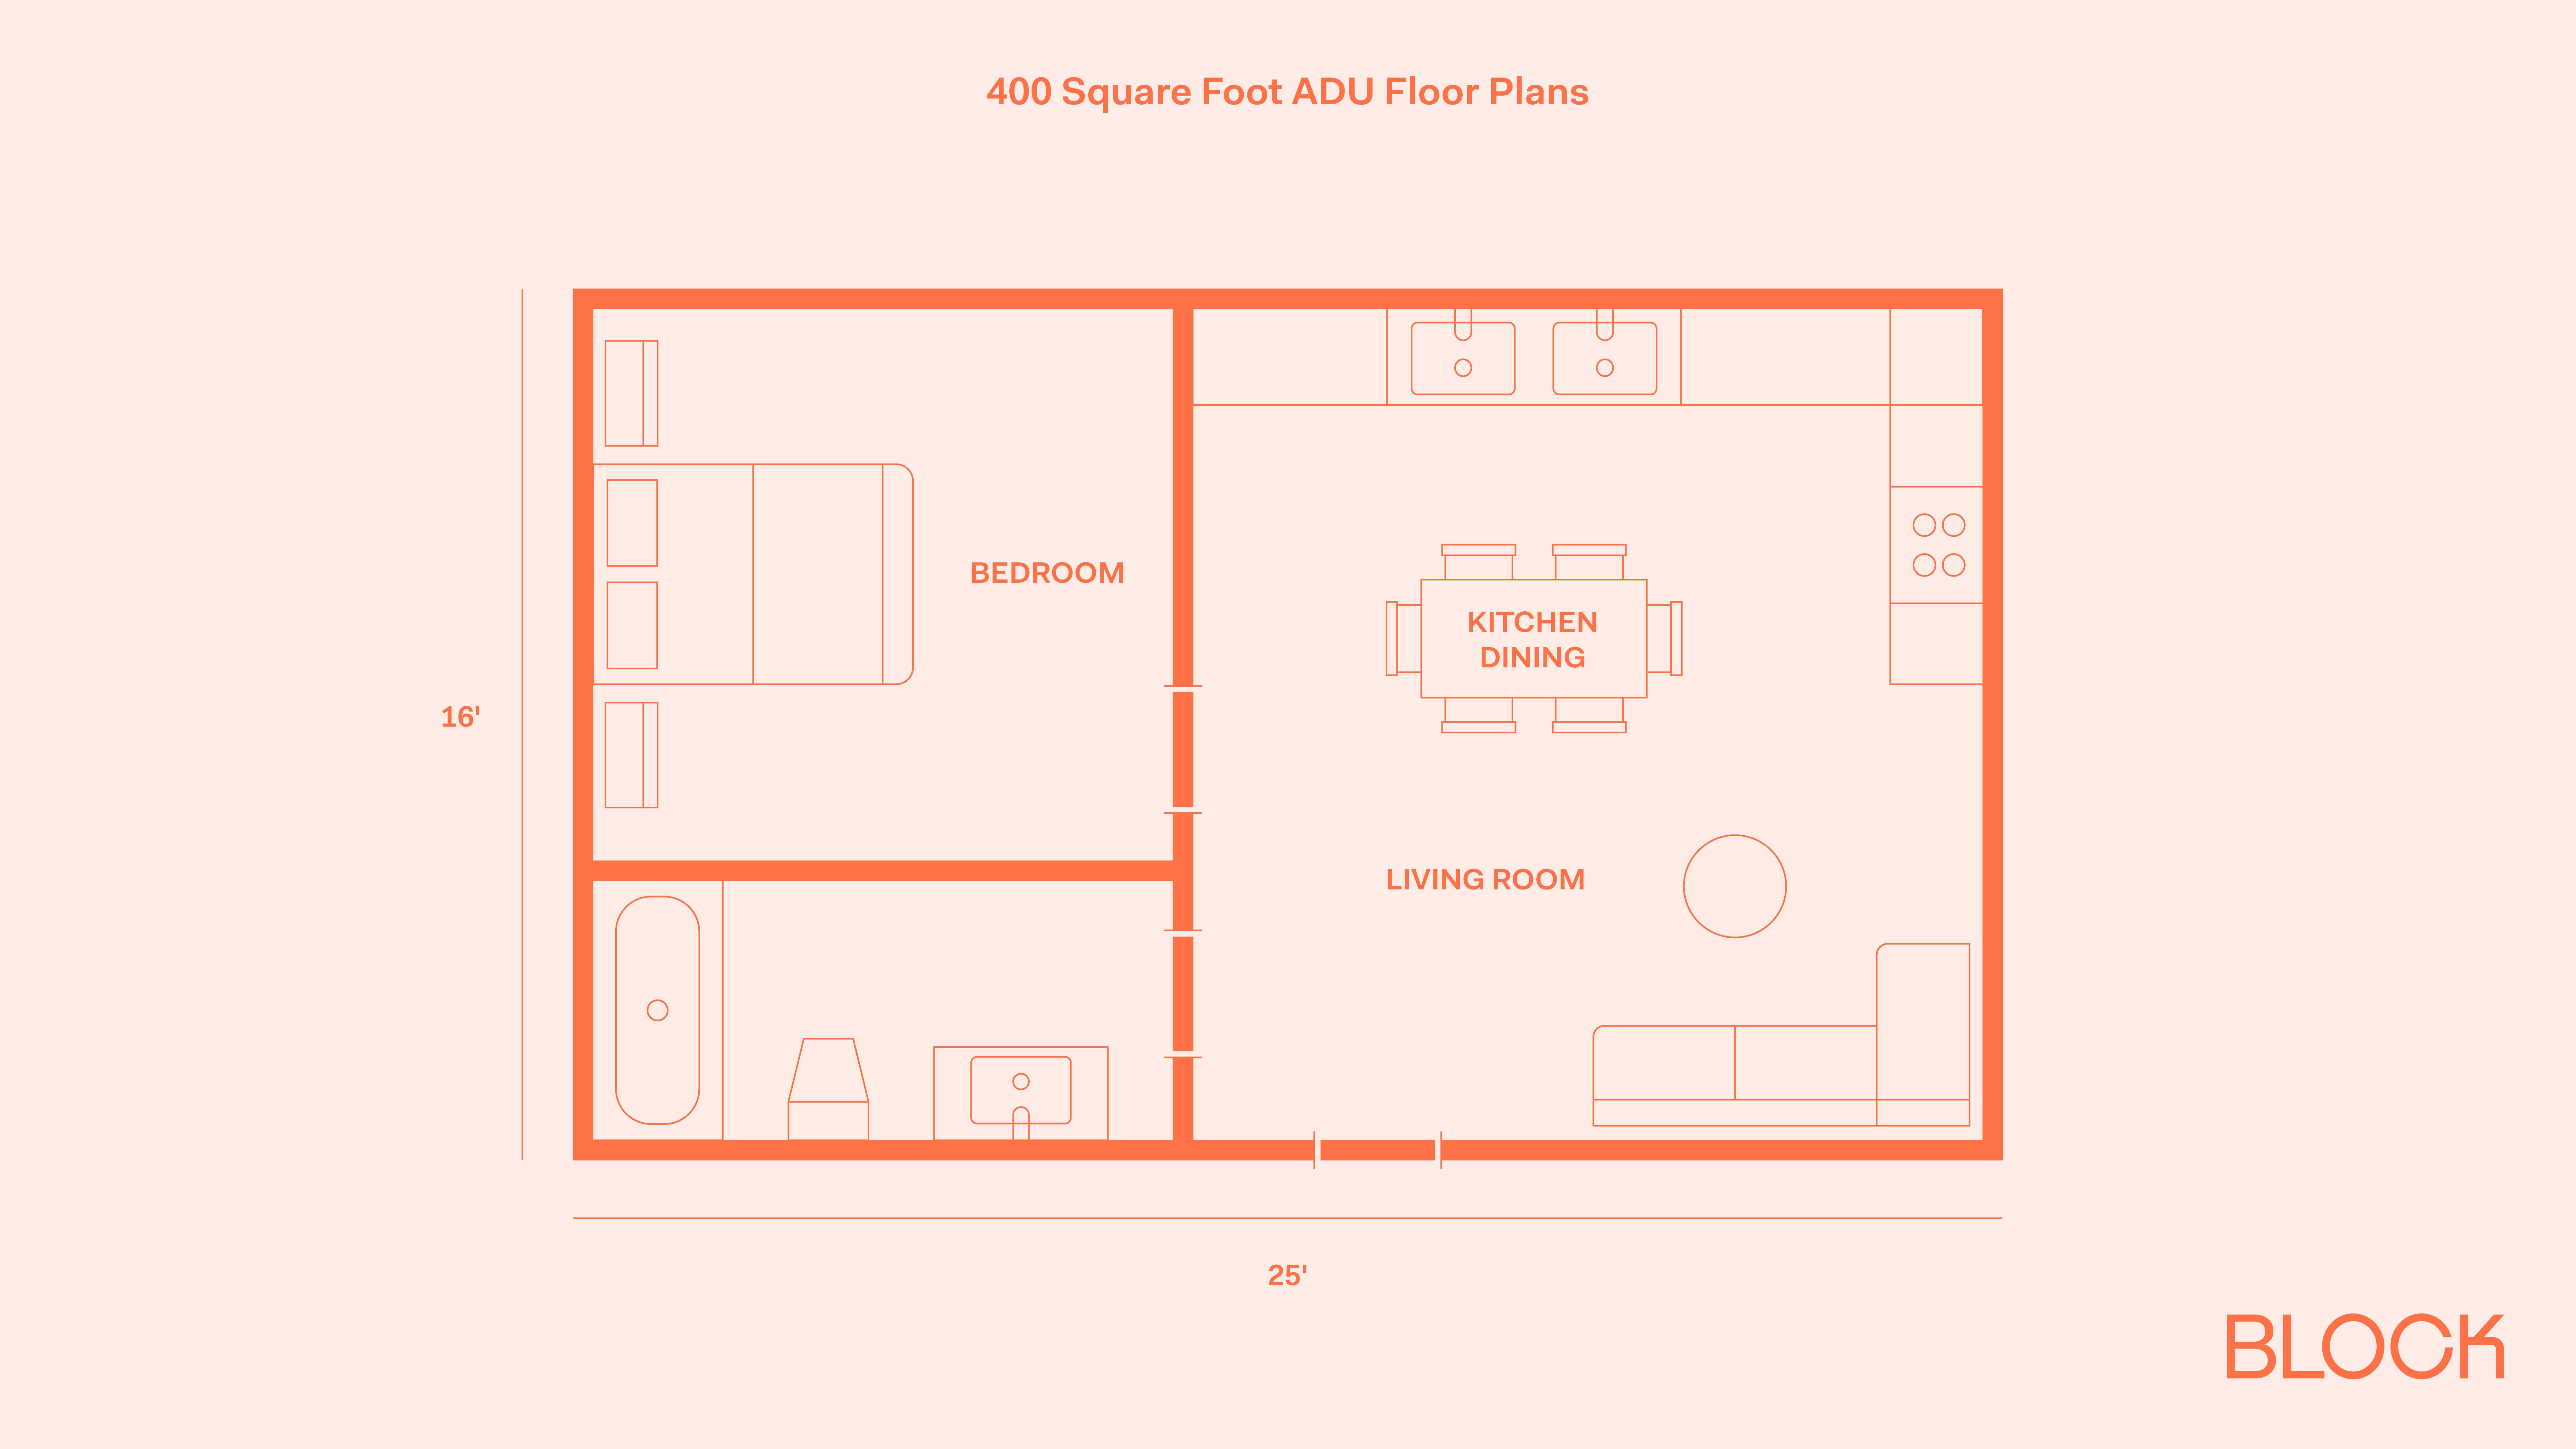
A long rectangle is easier to furnish than a square because you can run zones along one axis. Here, the bedroom and bathroom stack on the left side, and the kitchen, dining, and living areas fill the right.
The L-shaped kitchen takes the top-right corner with double sinks and a cooktop. The dining table sits center. The living area takes the bottom-right with a sectional and chair. Living and dining each get real space.
The bathroom and kitchen share an internal wall axis, which keeps wet fixtures grouped. The bedroom-to-bathroom adjacency works for nighttime use.
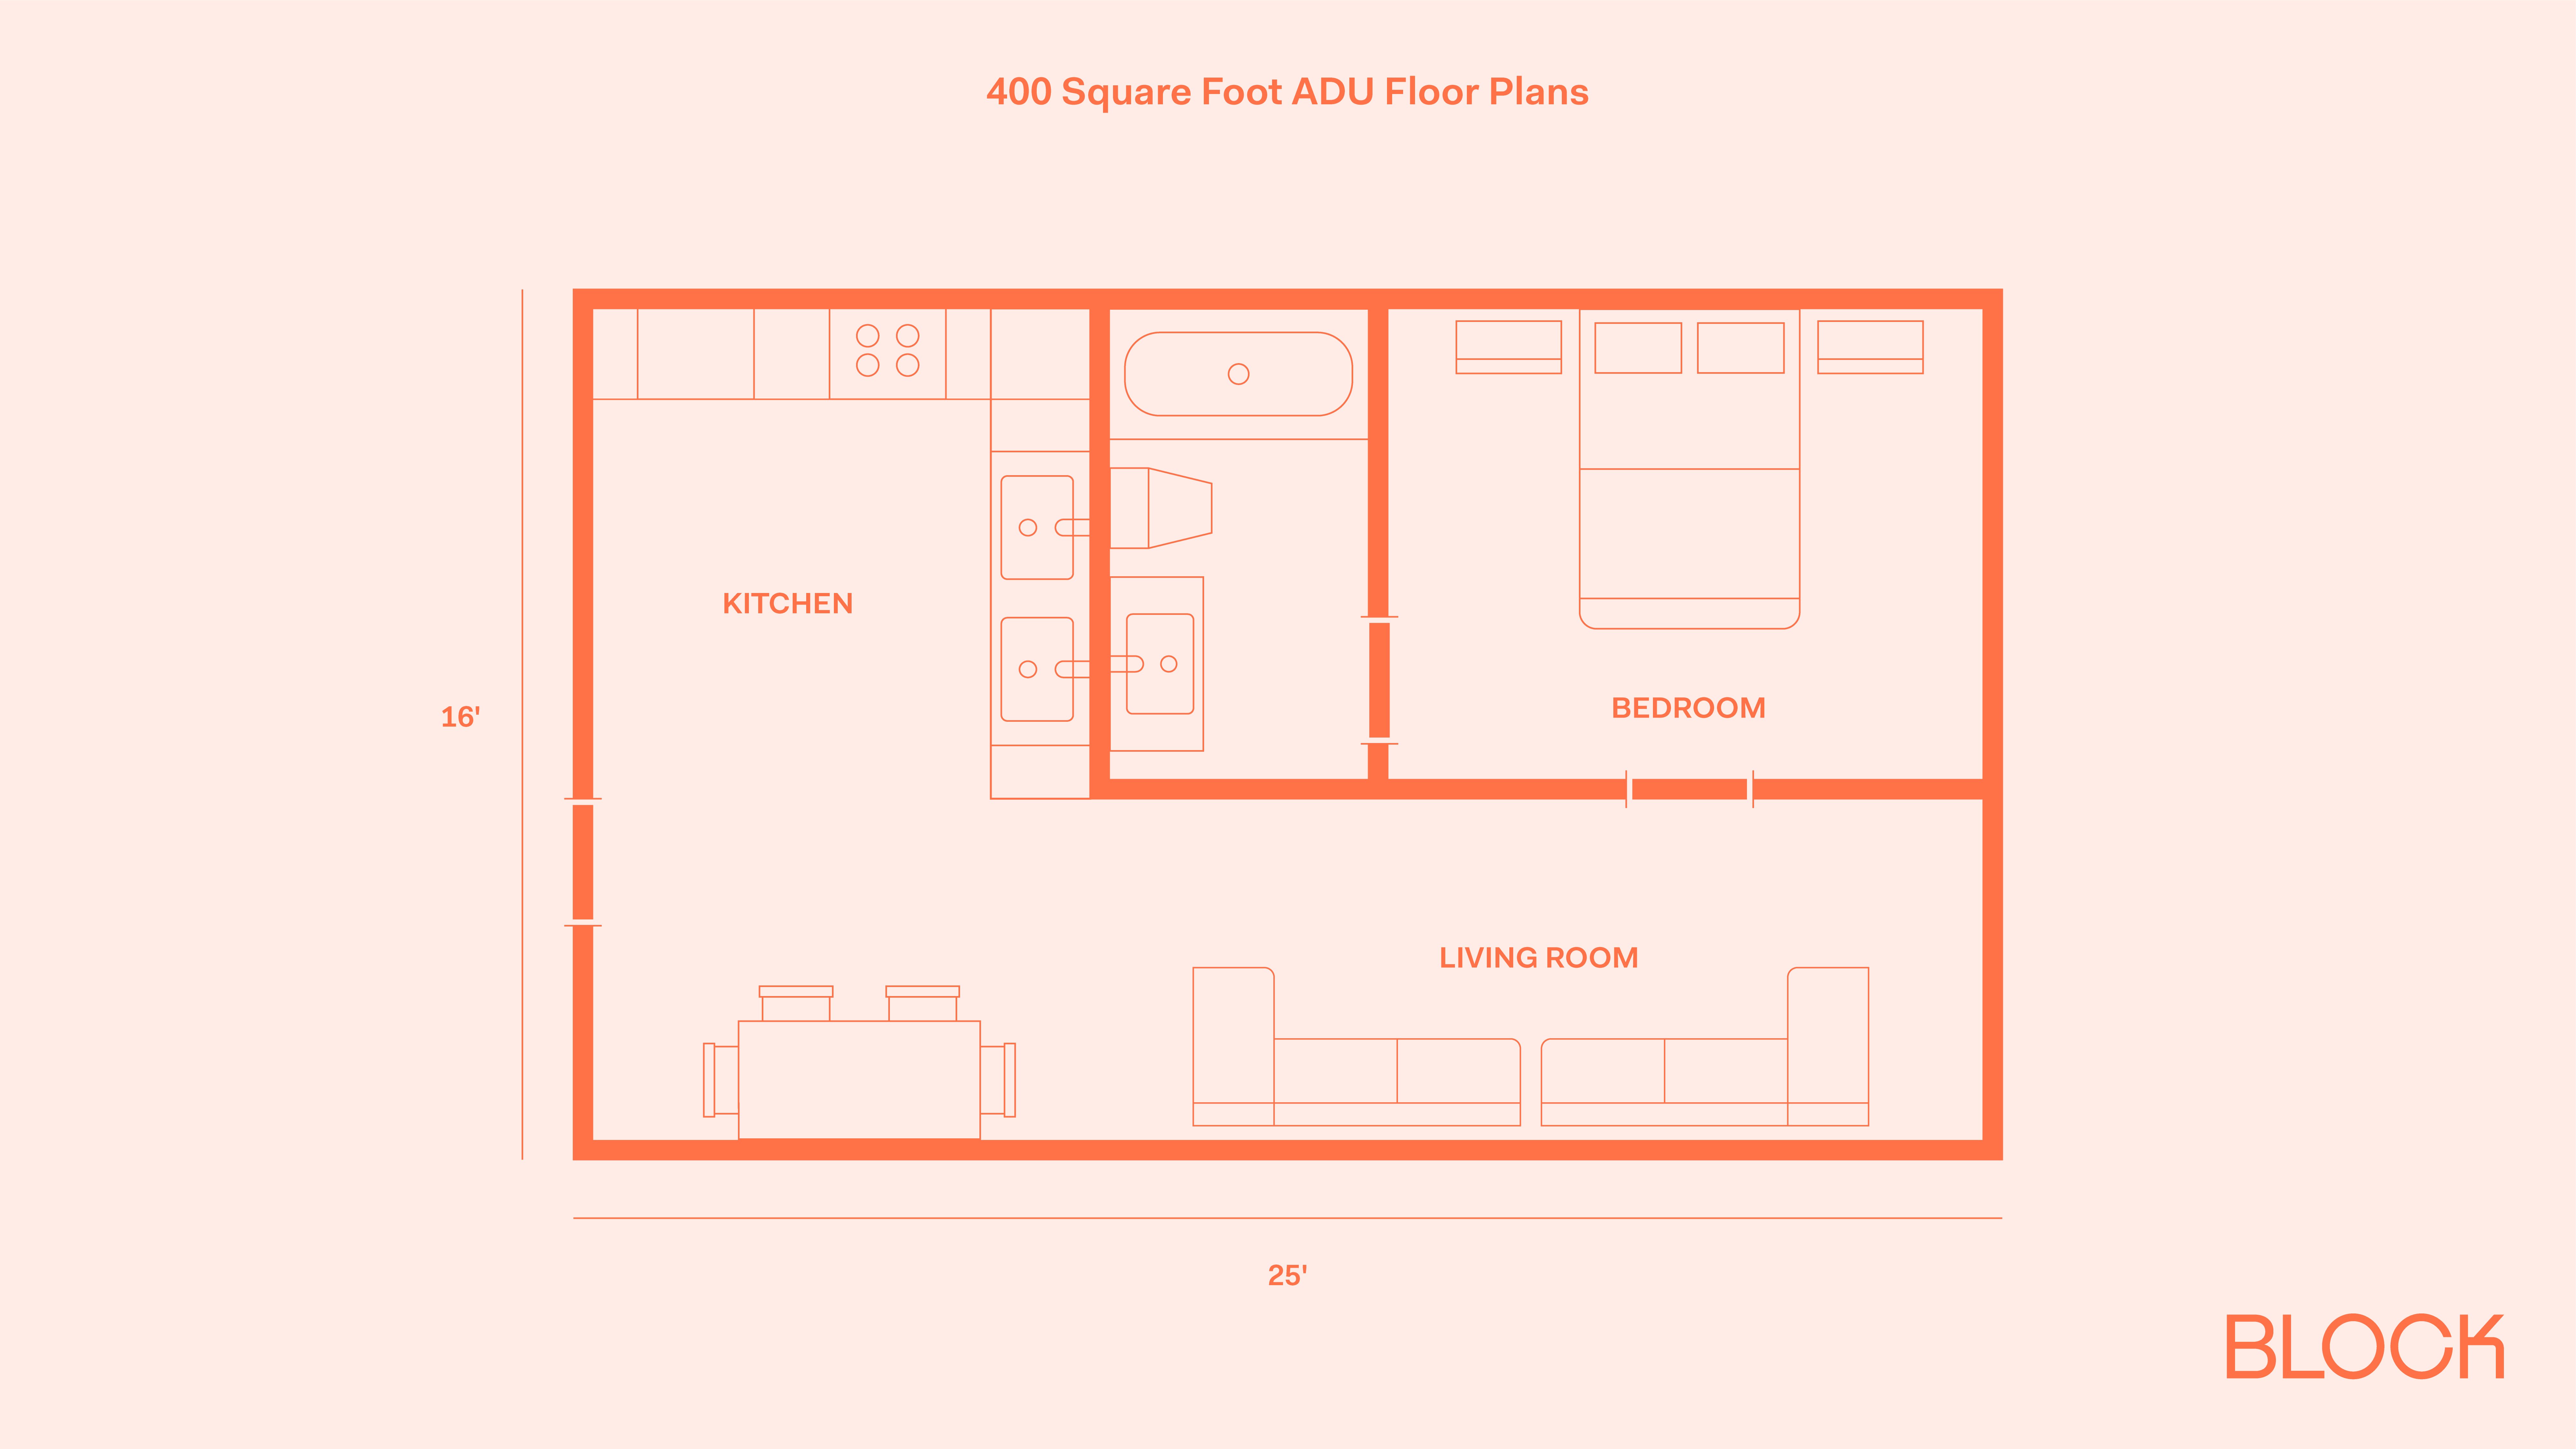
Kitchen on the left, bathroom in the middle, bedroom on the right. The bottom 25 feet is one long living and dining strip.
Plumbing is concentrated. Kitchen and bath share a central wet wall, which keeps rough-in tight. The bedroom is compact at roughly 9 by 7, sized at the IRC habitable-room minimum and scaled for a single occupant or a couple comfortable with a tighter sleeping zone. The generous downstairs is where this plan invests its square footage.
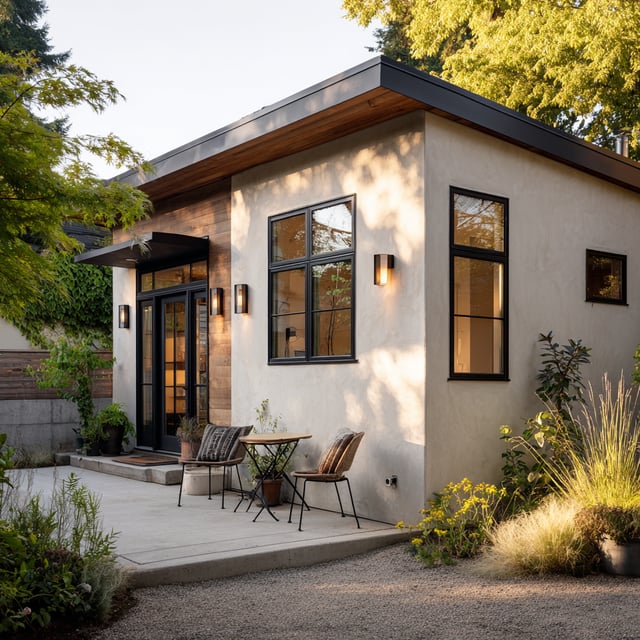
CRS Builders, a contractor in Block's network, put up two detached ADUs in San Diego County that show what this size range costs in practice. Both were ground-up builds, both took 20 weeks, and both fit a bedroom, a full bathroom, a kitchenette, and an open living area.
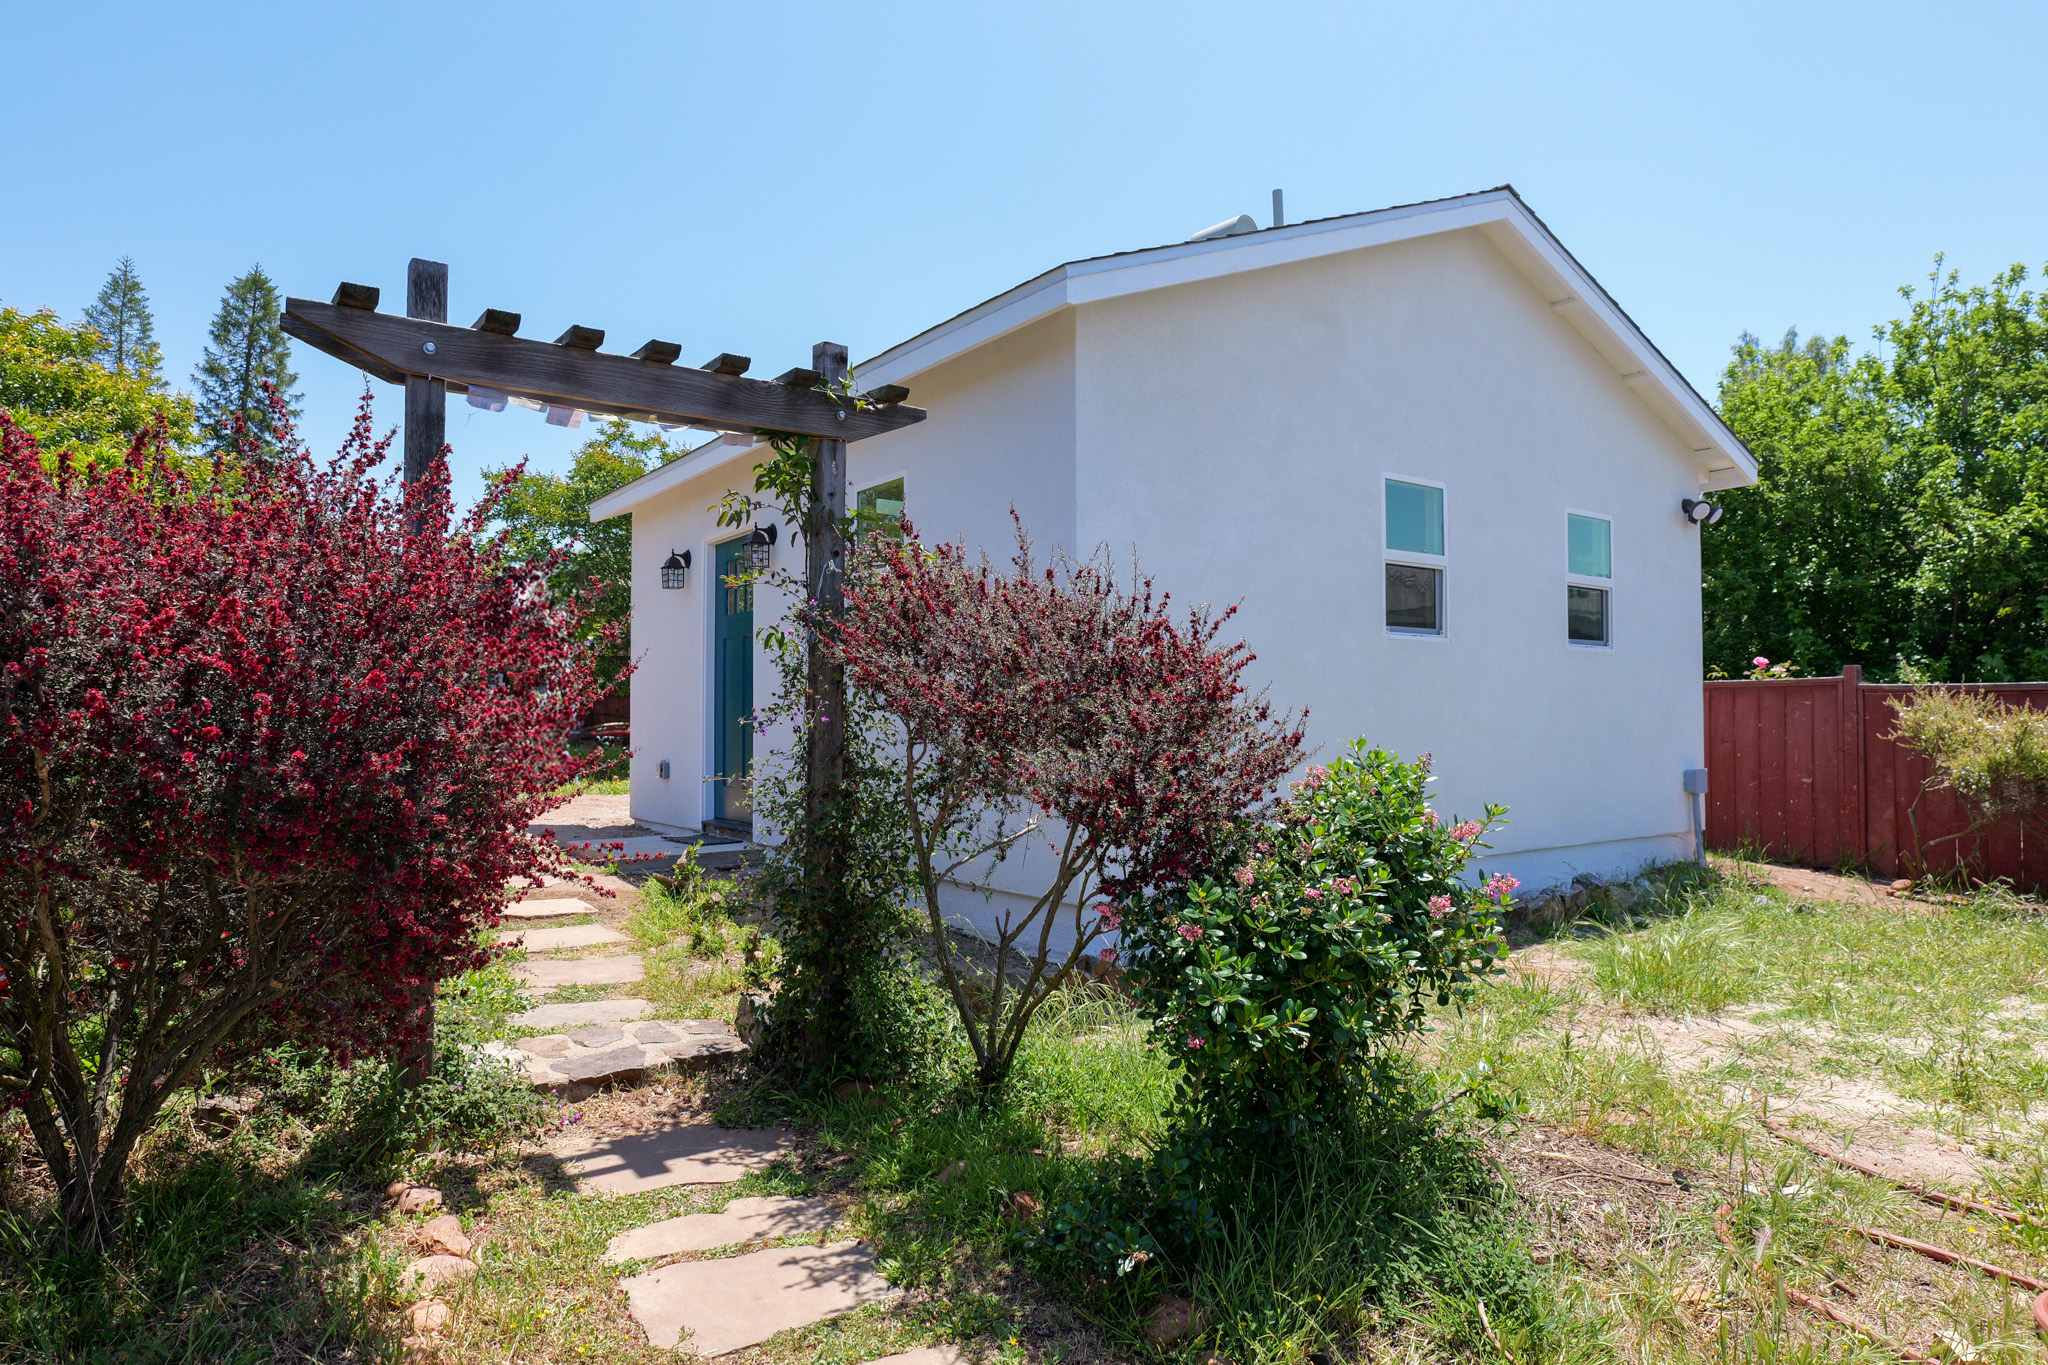
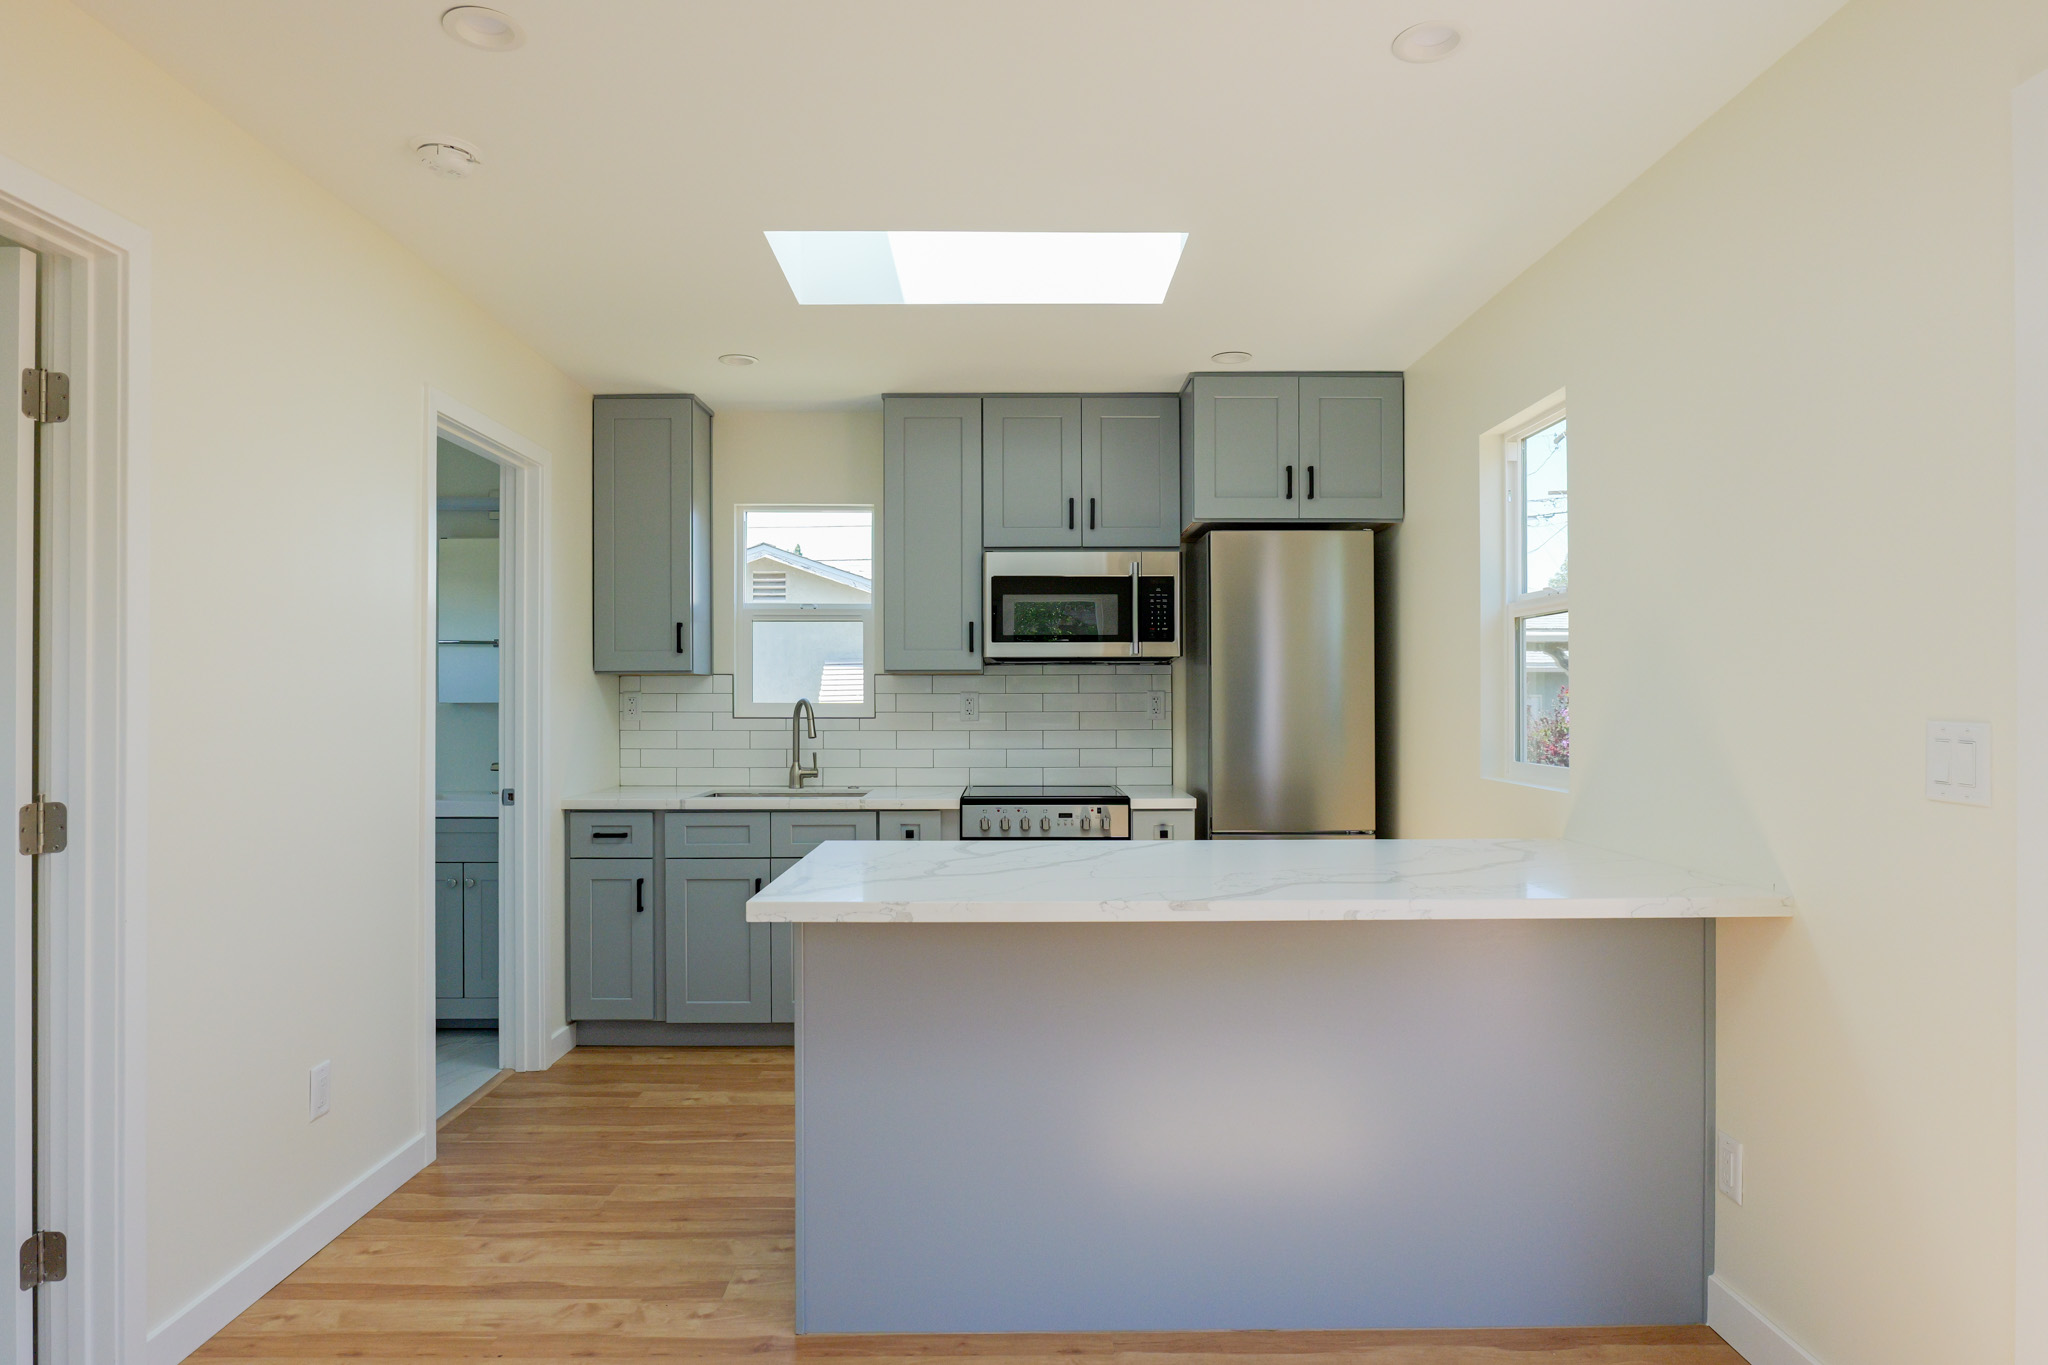
That works out to roughly $550 to $600 per square foot, well above what most whole-house construction runs. A 400 square foot unit still needs a foundation, a service panel, a roof, a full bathroom, and a full kitchen, and you pay close to full price for that kitchen and bathroom whether they sit in 400 square feet or 1,200.
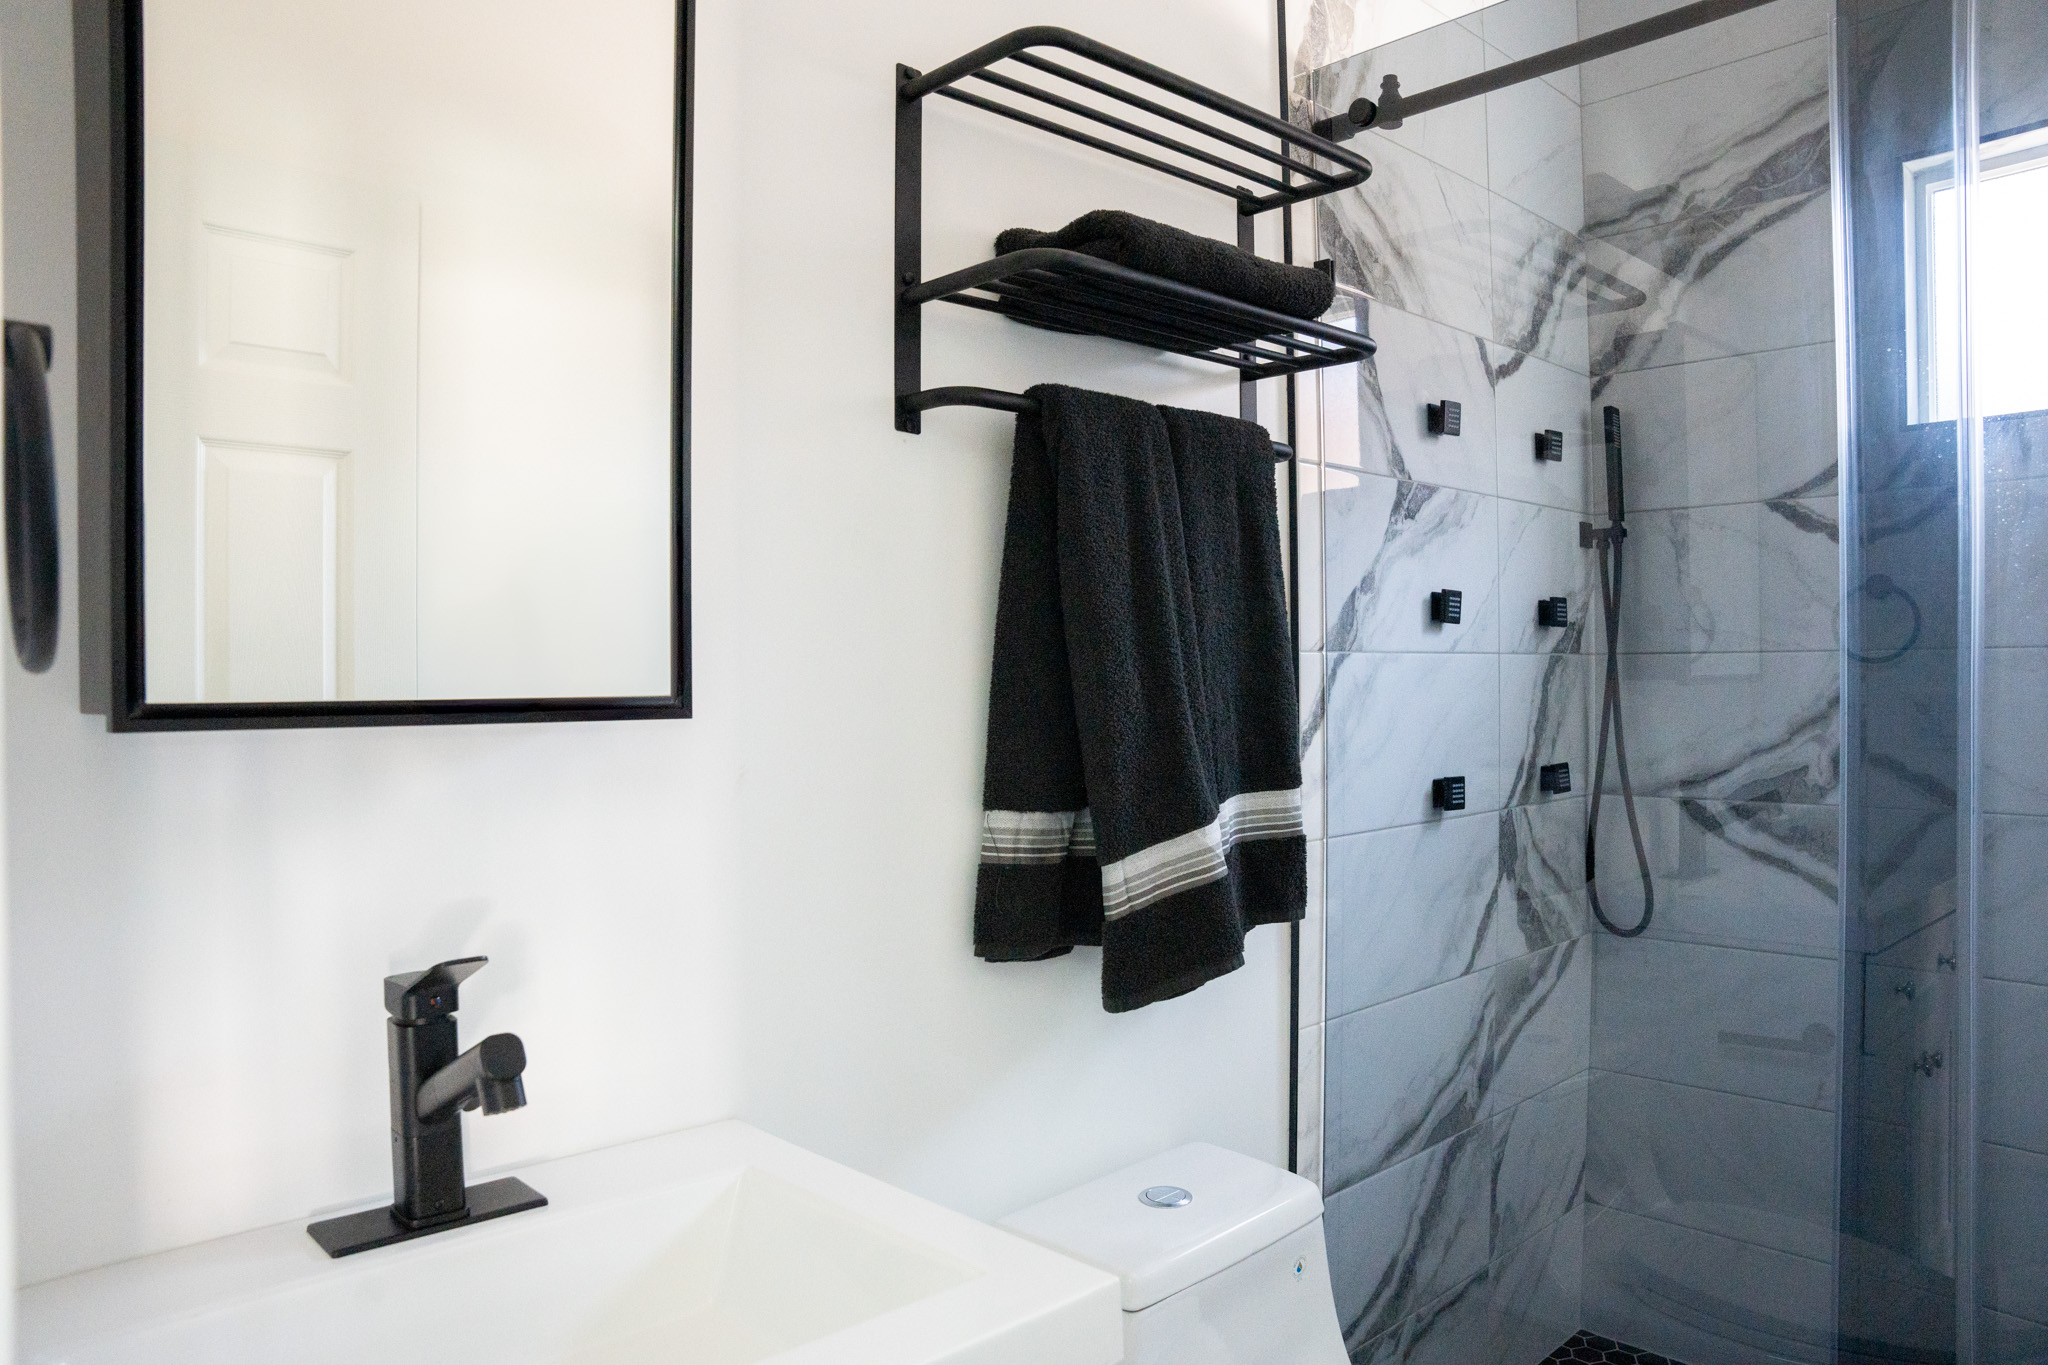
Neither unit skimped on the things that make a small space livable, like a full-size shower and a dedicated laundry closet.
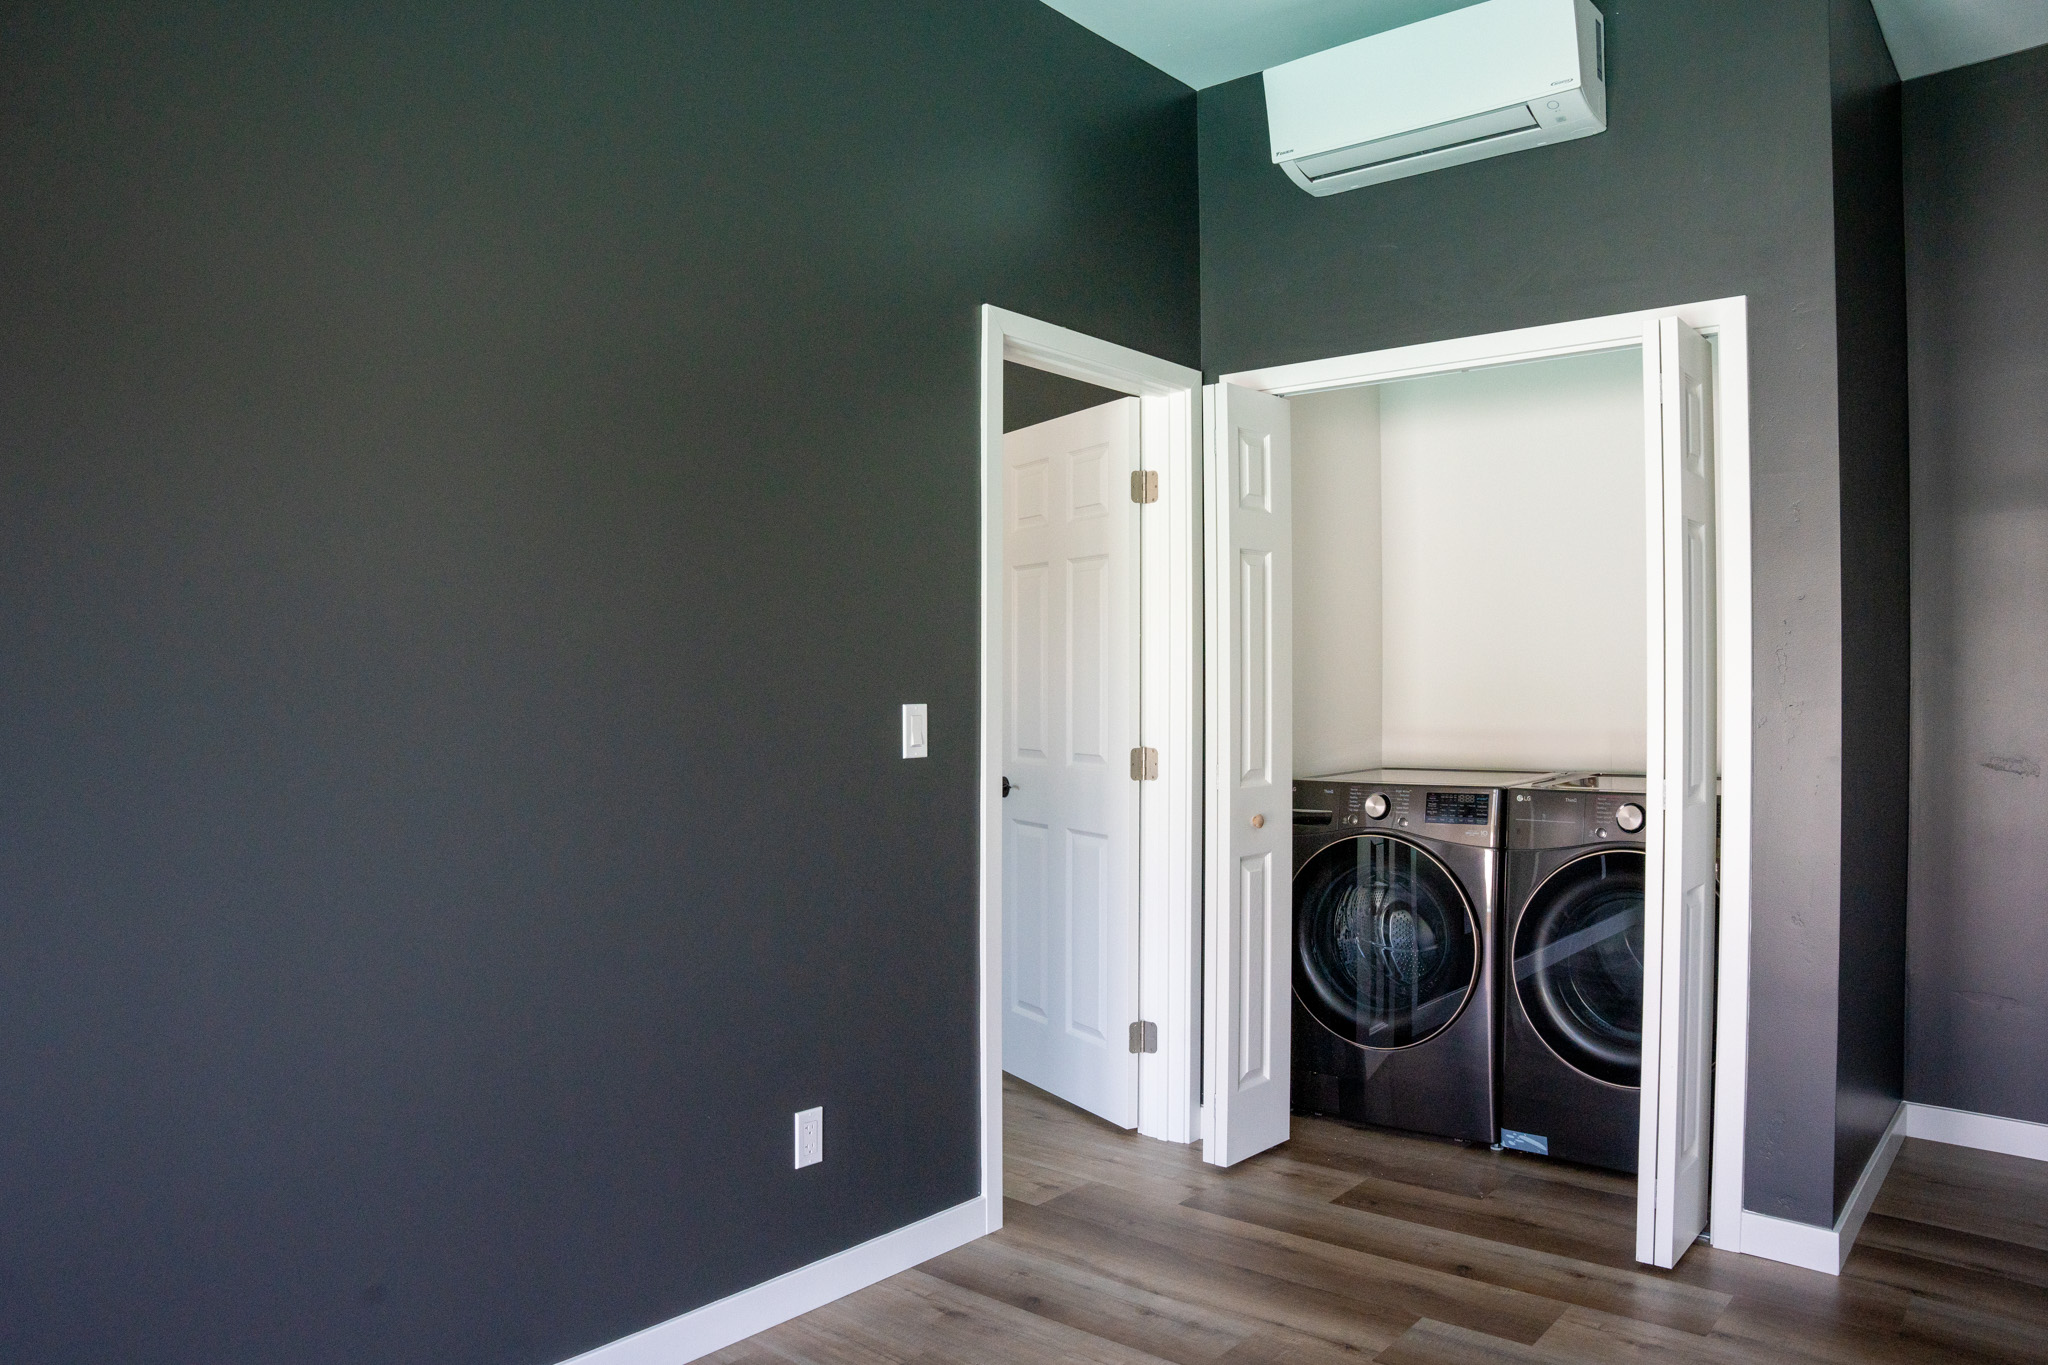
Both of these were ground-up builds, so the budget covered the entire structure: excavation, a new foundation, framing, sheathing, roofing, siding, and windows, on top of everything inside.
A 400-square foot garage conversion removes most of that list from the scope, since the slab, walls, and roof already exist. What stays is the expensive interior work, and it costs roughly the same either way: plumbing rough-in, a subpanel and new circuits, insulation, HVAC, drywall, a kitchen, a bathroom, flooring, permits, and design.
That is why a conversion comes in below these two projects without coming in at half the price, and why the gap narrows when the slab has to be cut for new drain lines or the walls need reinforcement.
Converting a garage or other existing structure into an ADU is usually cheaper than building from the ground up. The foundation, walls, and roof already exist, and you're not pouring concrete or framing from scratch. But "cheaper" assumes you work with the structure instead of against it.
Every time you move a plumbing fixture far from existing supply or drain lines, the cost goes up. Garages often have a single hose bib on an exterior wall and nothing else. Running new drain lines under a concrete slab means cutting and patching the slab, which adds thousands of dollars. Plans 1 and 4 above are smart about this because they cluster the kitchen and bathroom on one shared wet wall. That kind of layout is much cheaper to rough in than a plan with the bathroom and kitchen on opposite sides.
If you're converting a garage, walk the perimeter with your contractor before you commit to a plan. Ask where the main sewer line runs and what it would cost to add a second wet zone. The answer often reshapes the layout.
Compare Proposals with Ease
Most garages are uninsulated, with a concrete slab that gets cold in winter and hot in summer. Bringing the space up to habitable code means adding insulation in the walls, ceiling, and (often) under or over the slab. R-value targets vary by climate zone: northern climates typically require R-21 walls and R-49 ceilings, while southern climates can drop to R-13 walls and R-30 ceilings.
The two common wall and ceiling insulation choices:
The slab is the bigger comfort decision. A concrete slab without insulation underneath leaks heat in winter and stays cool in summer, which sounds fine until you live on it. The common retrofit is a floating subfloor system that adds an inch or two and creates a thermal break, at $2 to $4 per square foot installed. The more expensive option is removing the slab entirely and pouring new with insulation underneath, which gets you radiant floor heat as a bonus but adds tens of thousands to the project.
Budget 8 to 15% of the total project for insulation and subfloor work alone. It's one of the biggest hidden costs in a garage ADU conversion, and one of the first numbers to confirm with your contractor.
Garages often have ceilings around 8 feet. After insulation, drywall, and any necessary structural reinforcement, you might lose 4 to 6 inches. IRC Appendix AQ allows habitable ceilings as low as 6 feet 8 inches, but anything below 7 feet feels tight. Confirm your finished ceiling height during planning, not after framing.
Egress is the other one. Every sleeping room needs a window that meets specific dimensions: 5.7 square feet of openable area, 24 inches minimum height, 20 inches minimum width, and a sill no more than 44 inches off the finished floor. Garage windows, if they exist at all, rarely meet this standard. Adding a code-compliant egress window means cutting into the existing wall structure, which has cost and structural implications.
Most garage conversions fill in the old garage door, but keeping the rough opening as a large window or sliding glass door is often worth the upcharge. Natural light is one of the hardest things to add to a converted garage. A wall of glass where the door used to be can make 400 square feet feel twice as large.
Not sure how to begin your renovation?
Get free, expert guidance from a dedicated Block Project Planner who can help you navigate proposals, timelines, contractor selection, and more.
Book A Free Consultation
Foundation, framing, electrical, plumbing, HVAC, insulation, finishes, permits, and inspections all come into play, whether you're converting a garage or building from scratch. The contractor you hire makes more of a difference than any single design decision.
Block matches you with vetted local contractors who've built ADUs before. Every scope gets reviewed by Block experts and AI-enabled tools before bids come in, which catches missing line items and red flags early. Payments stay in Block's secure system and release as work gets approved, so contractors are paid for progress, not promises. Tell Block your project details once and let the area's best builders compete for the work.
Remodel with confidence through Block

Connect to vetted local contractors
We only work with top-tier, thoroughly vetted contractors

Get expert guidance
Our project planners offer expert advice, scope review, and ongoing support as needed
Enjoy peace of mind throughout your renovation
Secure payment system puts you in control and protects your remodel

Renovate confidently with Block
Easily compare quotes from top quality contractors, and get peace of mind with warranty & price protections.
ADUs
How Much Does It Cost to Build or Remodel a Guest House?
08.28.2026
Los Angeles
Garage Conversion to ADU Los Angeles: Top Contractors & Tips
08.14.2026
ADUs
Backyard Office Shed: Is Prefab Right for You?
07.25.2026
ADUs
L-Shaped ADU Plans: Layouts, Costs, Pros and Cons
07.13.2026
ADUs
Detached ADU Cost: What You'll Really Pay
06.19.2026